 на главную сниппетов
This Linux Command Handbook will cover 60 core Bash commands you will need as a developer. Each command includes example code and tips for when to use it.
This Linux Command Handbook follows the 80/20 rule: you'll learn 80% of a topic in around 20% of the time you spend studying it.
I find that this approach gives you a well-rounded overview.
This handbook does not try to cover everything under the sun related to Linux and its commands. It focuses on the small core commands that you will use the 80% or 90% of the time, and tries to simplify the usage of the more complex ones.
All these commands work on Linux, macOS, WSL, and anywhere you have a UNIX environment.
I hope the contents of this handbook will help you achieve what you want: getting comfortable with Linux.
man commandls commandcd commandpwd commandmkdir commandrmdir commandmv commandcp commandopen commandtouch commandfind commandln commandgzip commandgunzip commandtar commandalias commandcat commandless commandtail commandwc commandgrep commandsort commanduniq commanddiff commandecho commandchown commandchmod commandumask commanddu commanddf commandbasename commanddirname commandps commandtop commandkill commandkillall commandjobs commandbg commandfg commandtype commandwhich commandnohup commandxargs commandvim editor commandemacs editor commandnano editor commandwhoami commandwho commandsu commandsudo commandpasswd commandping commandtraceroute commandclear commandhistory commandexport commandcrontab commanduname commandenv commandprintenv commandLinux is an operating system, like macOS or Windows.
It is also the most popular Open Source operating system, and it gives you a lot of freedom.
It powers the vast majority of the servers that compose the Internet. It's the base upon which everything is built. But not just that. Android is based on (a modified version of) Linux.
The Linux "core" (called a kernel) was born in 1991 in Finland, and it has come a really long way from its humble beginnings. It went on to be the kernel of the GNU Operating System, creating the duo GNU/Linux.
There's one thing about Linux that corporations like Microsoft, Apple, and Google will never be able to offer: the freedom to do whatever you want with your computer.
They're actually going in the opposite direction, building walled gardens, especially on the mobile side.
Linux is the ultimate freedom.
It is developed by volunteers, some paid by companies that rely on it, some independently. But there's no single commercial company that can dictate what goes into Linux, or the project's priorities.
You can also use Linux as your day to day computer. I use macOS because I really enjoy the applications and design (and I also used to be an iOS and Mac apps developer). But before using macOS I used Linux as my main computer Operating System.
No one can dictate which apps you can run, or "call home" with apps that track you, your position, and more.
Linux is also special because there's not just "one Linux", like is the case with Windows or macOS. Instead, we have distributions.
A "distro" is made by a company or organization and packages the Linux core with additional programs and tooling.
For example you have Debian, Red Hat, and Ubuntu, probably the most popular distributions.
But many, many more exist. You can create your own distribution, too. But most likely you'll use a popular one that has lots of users and a community of people around it. This lets you do what you need to do without losing too much time reinventing the wheel and figuring out answers to common problems.
Some desktop computers and laptops ship with Linux preinstalled. Or you can install it on your Windows-based computer, or on a Mac.
But you don't need to disrupt your existing computer just to get an idea of how Linux works.
I don't have a Linux computer.
If you use a Mac, you just need to know that under the hood macOS is a UNIX Operating System. It shares a lot of the same ideas and software that a GNU/Linux system uses, because GNU/Linux is a free alternative to UNIX.
UNIX is an umbrella term that groups many operating systems used in big corporations and institutions, starting from the 70's
The macOS terminal gives you access to the same exact commands I'll describe in the rest of this handbook.
Microsoft has an official Windows Subsystem for Linux which you can (and should!) install on Windows. This will give you the ability to run Linux in a very easy way on your PC.
But the vast majority of the time you will run a Linux computer in the cloud via a VPS (Virtual Private Server) like DigitalOcean.
A shell is a command interpreter that exposes an interface to the user to work with the underlying operating system.
It allows you to execute operations using text and commands, and it provides users advanced features like being able to create scripts.
This is important: shells let you perform things in a more optimized way than a GUI (Graphical User Interface) could ever possibly let you do. Command line tools can offer many different configuration options without being too complex to use.
There are many different kind of shells. This post focuses on Unix shells, the ones that you will find commonly on Linux and macOS computers.
Many different kind of shells were created for those systems over time, and a few of them dominate the space: Bash, Csh, Zsh, Fish and many more!
All shells originate from the Bourne Shell, called sh. "Bourne" because its creator was Steve Bourne.
Bash means Bourne-again shell. sh was proprietary and not open source, and Bash was created in 1989 to create a free alternative for the GNU project and the Free Software Foundation. Since projects had to pay to use the Bourne shell, Bash became very popular.
If you use a Mac, try opening your Mac terminal. By default it runs ZSH (or, pre-Catalina, Bash).
You can set up your system to run any kind of shell – for example I use the Fish shell.
Each single shell has its own unique features and advanced usage, but they all share a common functionality: they can let you execute programs, and they can be programmed.
In the rest of this handbook we'll see in detail the most common commands you will use.
man command
The first command I'll introduce will help you understand all the other commands.
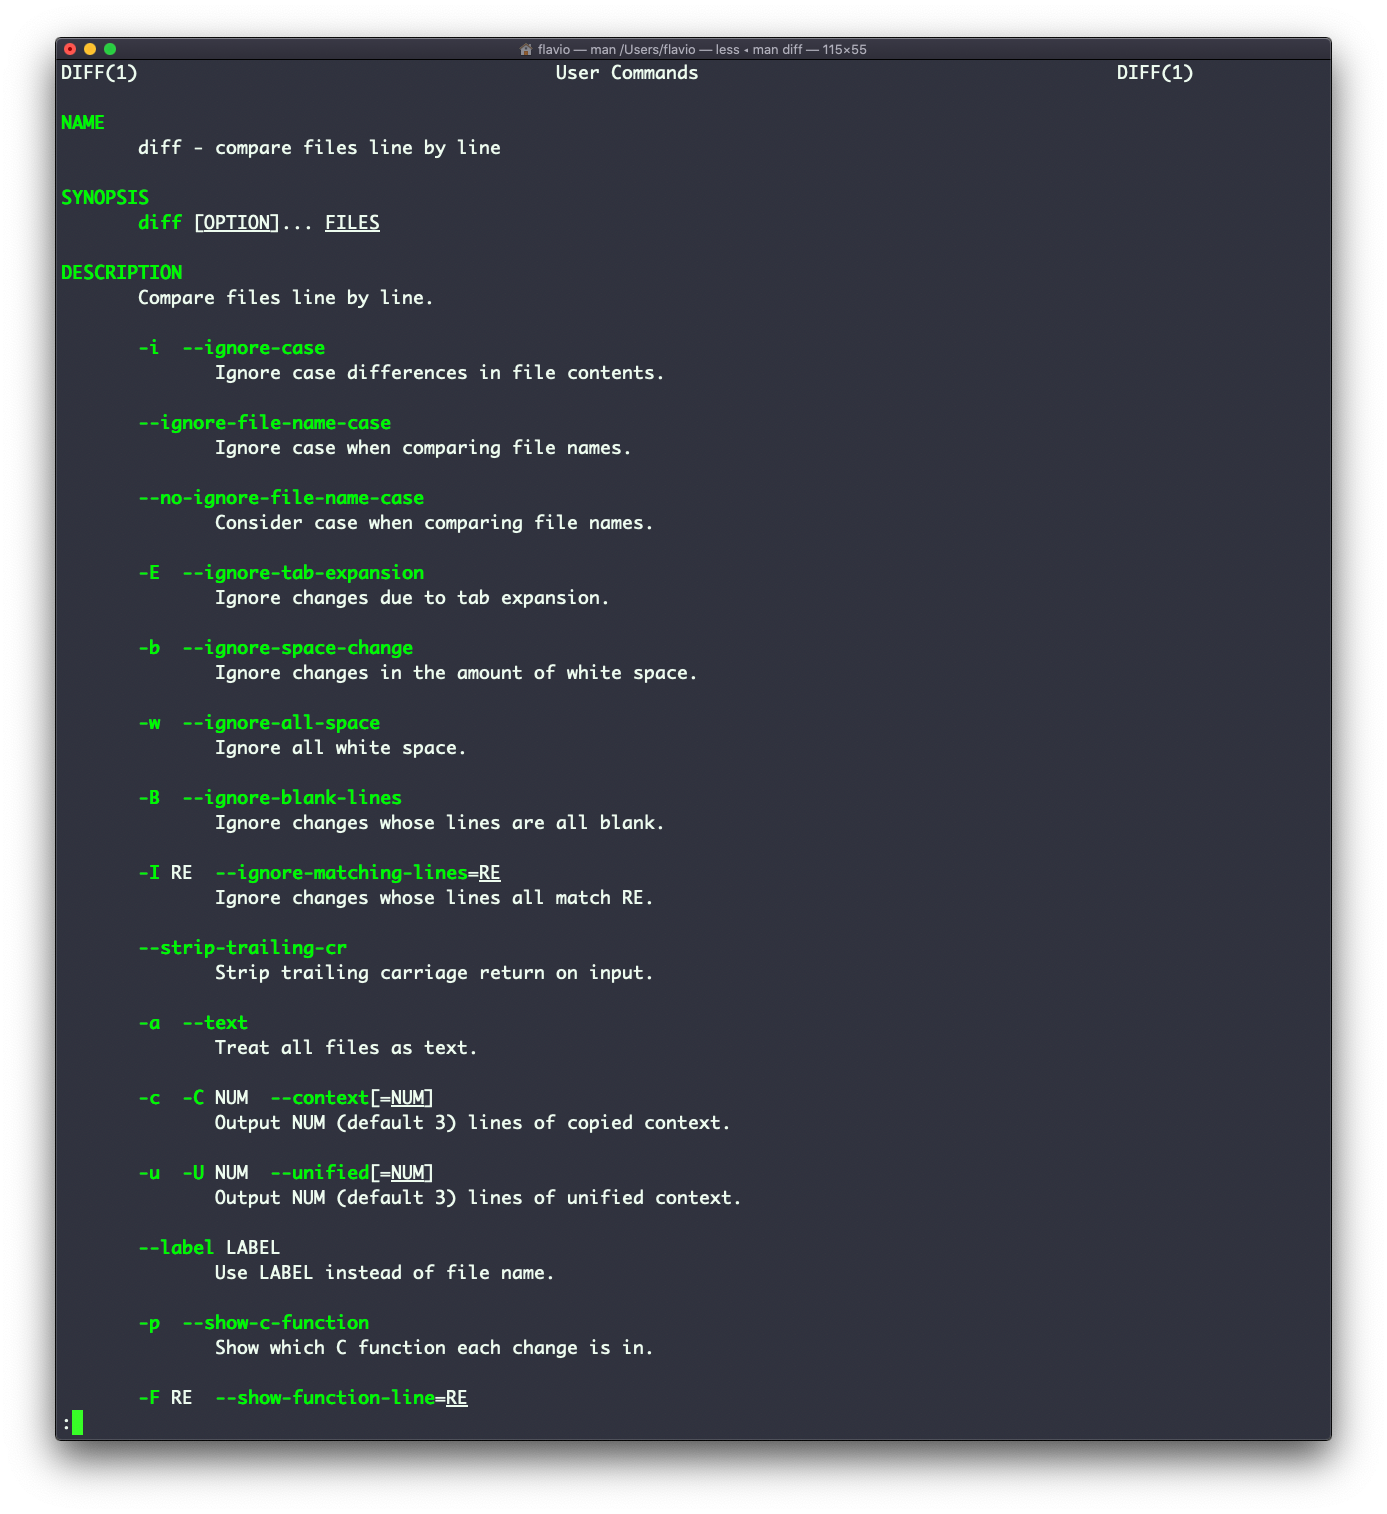
Every time I don't know how to use a command, I type man <command> to get the manual:
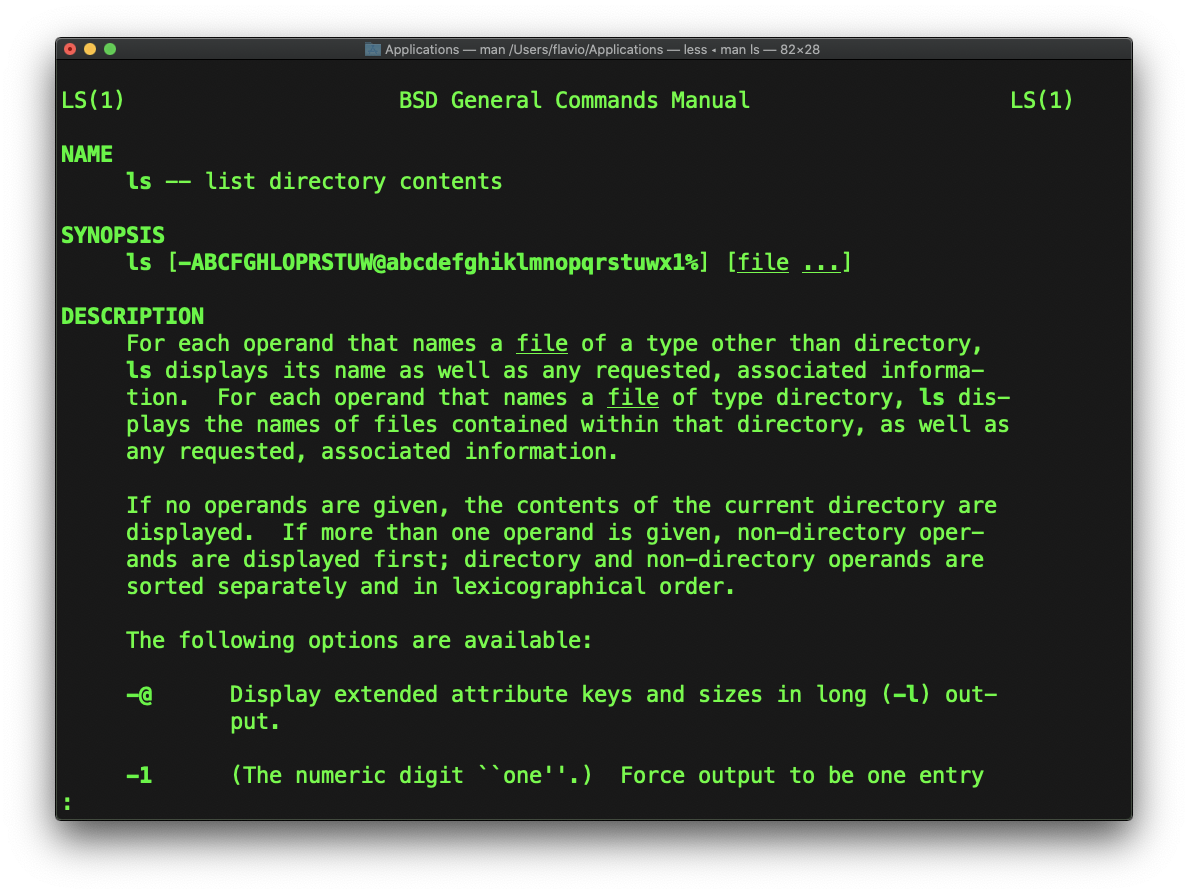
This is a man (from _manual_) page. Man pages are an essential tool to learn as a developer. They contain so much information that sometimes it's almost too much.
The above screenshot is just 1 of 14 screens of explanation for the ls command.
Most of the time when I need to learn a command quickly I use this site called tldr pages: https://tldr.sh. It's a command you can install, which you then run like this: tldr <command>. It gives you a very quick overview of a command, with some handy examples of common usage scenarios:
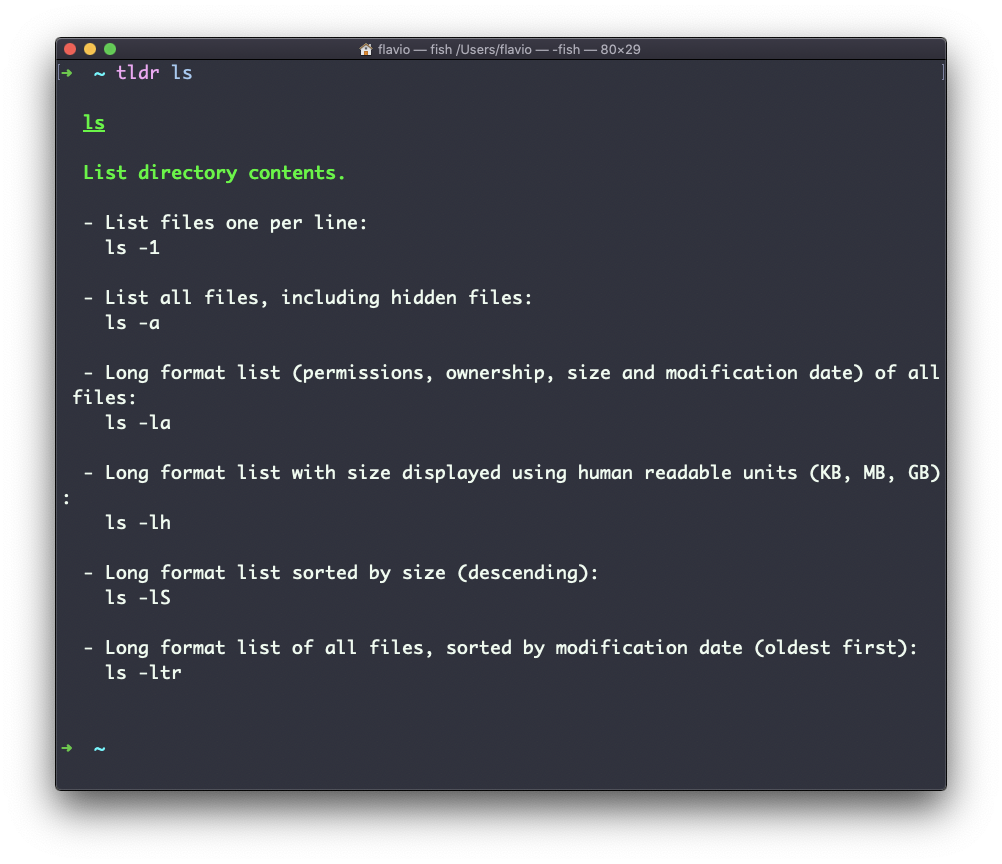
This is not a substitute for man, but a handy tool to avoid losing yourself in the huge amount of information present in a man page. Then you can use the man page to explore all the different options and parameters you can use on a command.
ls commandInside a folder you can list all the files that the folder contains using the ls command:
ls
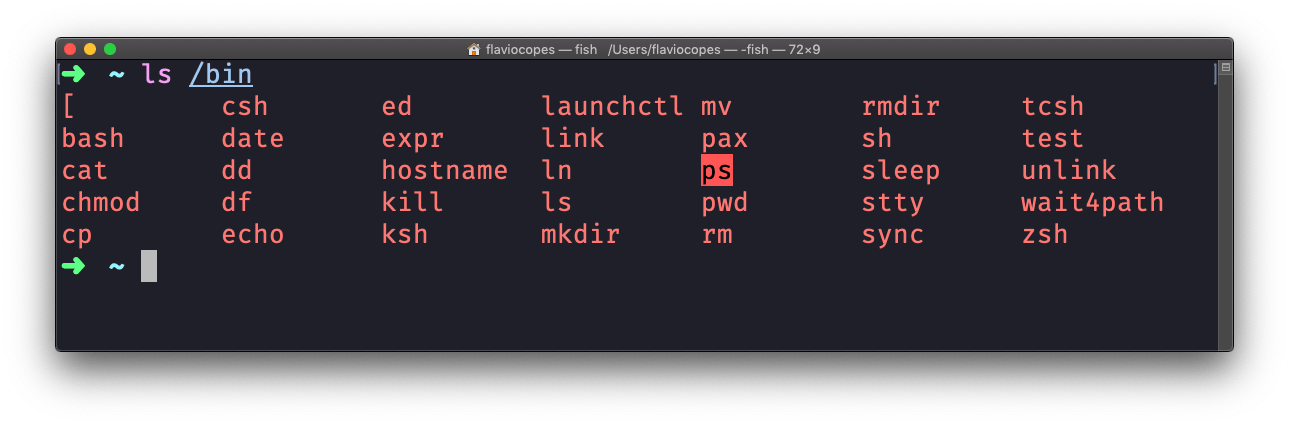
If you add a folder name or path, it will print that folder's contents:
ls /bin
ls accepts a lot of options. One of my favorite combinations is -al. Try it:
ls -al /bin
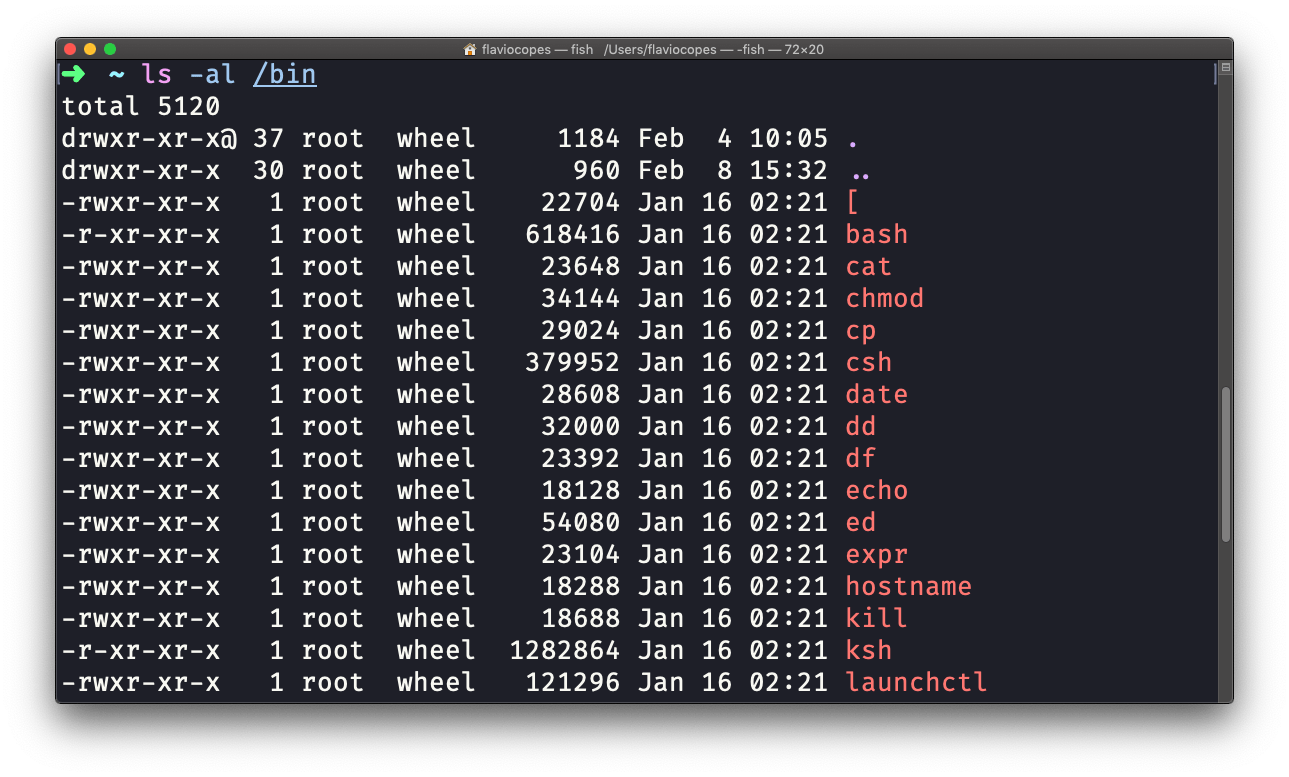
Compared to the plain ls command, this returns much more information.
You have, from left to right:
This set of data is generated by the l option. The a option instead also shows the hidden files.
Hidden files are files that start with a dot (.).
cd commandOnce you have a folder, you can move into it using the cd command. cd means change directory. You invoke it specifying a folder to move into. You can specify a folder name, or an entire path.
Example:
mkdir fruits
cd fruits
Now you are in the fruits folder.
You can use the .. special path to indicate the parent folder:
cd .. #back to the home folder
The # character indicates the start of the comment, which lasts for the entire line after it's found.
You can use it to form a path:
mkdir fruits
mkdir cars
cd fruits
cd ../cars
There is another special path indicator which is ., and indicates the current folder.
You can also use absolute paths, which start from the root folder /:
cd /etc
pwd commandWhenever you feel lost in the filesystem, call the pwd command to know where you are:
pwd
It will print the current folder path.
mkdir commandYou create folders using the mkdir command:
mkdir fruits
You can create multiple folders with one command:
mkdir dogs cars
You can also create multiple nested folders by adding the -p option:
mkdir -p fruits/apples
Options in UNIX commands commonly take this form. You add them right after the command name, and they change how the command behaves. You can often combine multiple options, too.
You can find which options a command supports by typing man <commandname>. Try now with man mkdir for example (press the q key to esc the man page). Man pages are the amazing built-in help for UNIX.
rmdir commandJust as you can create a folder using mkdir, you can delete a folder using rmdir:
mkdir fruits
rmdir fruits
You can also delete multiple folders at once:
mkdir fruits cars
rmdir fruits cars
The folder you delete must be empty.
To delete folders with files in them, we'll use the more generic rm command which deletes files and folders, using the -rf option:
rm -rf fruits cars
Be careful as this command does not ask for confirmation and it will immediately remove anything you ask it to remove.
There is no bin when removing files from the command line, and recovering lost files can be hard.
mv commandOnce you have a file, you can move it around using the mv command. You specify the file current path, and its new path:
touch test
mv pear new_pear
The pear file is now moved to new_pear. This is how you rename files and folders.
If the last parameter is a folder, the file located at the first parameter path is going to be moved into that folder. In this case, you can specify a list of files and they will all be moved in the folder path identified by the last parameter:
touch pear
touch apple
mkdir fruits
mv pear apple fruits #pear and apple moved to the fruits folder
cp commandYou can copy a file using the cp command:
touch test
cp apple another_apple
To copy folders you need to add the -r option to recursively copy the whole folder contents:
mkdir fruits
cp -r fruits cars
open commandThe open command lets you open a file using this syntax:
open <filename>
You can also open a directory, which on macOS opens the Finder app with the current directory open:
open <directory name>
I use it all the time to open the current directory:
open .
The special
.symbol points to the current directory, as..points to the parent directory
The same command can also be be used to run an application:
open <application name>
touch commandYou can create an empty file using the touch command:
touch apple
If the file already exists, it opens the file in write mode, and the timestamp of the file is updated.
find commandThe find command can be used to find files or folders matching a particular search pattern. It searches recursively.
Let's learn how to use it by example.
Find all the files under the current tree that have the .js extension and print the relative path of each file that matches:
find . -name '*.js'
It's important to use quotes around special characters like * to avoid the shell interpreting them.
Find directories under the current tree matching the name "src":
find . -type d -name src
Use -type f to search only files, or -type l to only search symbolic links.
-name is case sensitive. use -iname to perform a case-insensitive search.
You can search under multiple root trees:
find folder1 folder2 -name filename.txt
Find directories under the current tree matching the name "node_modules" or 'public':
find . -type d -name node_modules -or -name public
You can also exclude a path using -not -path:
find . -type d -name '*.md' -not -path 'node_modules/*'
You can search files that have more than 100 characters (bytes) in them:
find . -type f -size +100c
Search files bigger than 100KB but smaller than 1MB:
find . -type f -size +100k -size -1M
Search files edited more than 3 days ago:
find . -type f -mtime +3
Search files edited in the last 24 hours:
find . -type f -mtime -1
You can delete all the files matching a search by adding the -delete option. This deletes all the files edited in the last 24 hours:
find . -type f -mtime -1 -delete
You can execute a command on each result of the search. In this example we run cat to print the file content:
find . -type f -exec cat {} \;
Notice the terminating \;. {} is filled with the file name at execution time.
ln commandThe ln command is part of the Linux file system commands.
It's used to create links. What is a link? It's like a pointer to another file, or a file that points to another file. You might be familiar with Windows shortcuts. They're similar.
We have 2 types of links: hard links and soft links.
Hard links are rarely used. They have a few limitations: you can't link to directories, and you can't link to external filesystems (disks).
A hard link is created using the following syntax:
ln <original> <link>
For example, say you have a file called recipes.txt. You can create a hard link to it using:
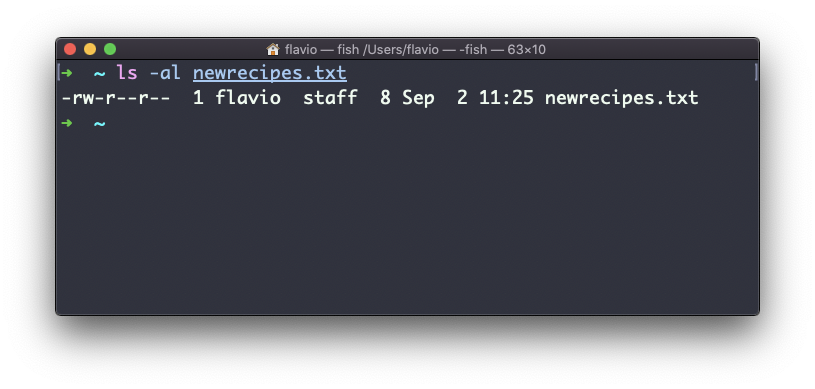
ln recipes.txt newrecipes.txt
The new hard link you created is indistinguishable from a regular file:
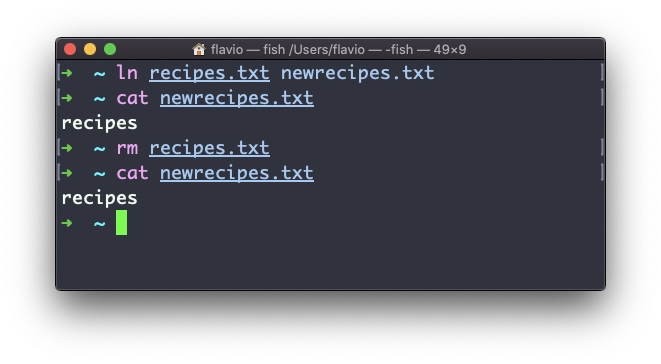
Now any time you edit any of those files, the content will be updated for both.
If you delete the original file, the link will still contain the original file content, as that's not removed until there is one hard link pointing to it.
Soft links are different. They are more powerful as you can link to other filesystems and to directories. But keep in mind that when the original is removed, the link will be broken.
You create soft links using the -s option of ln:
ln -s <original> <link>
For example, say you have a file called recipes.txt. You can create a soft link to it using:
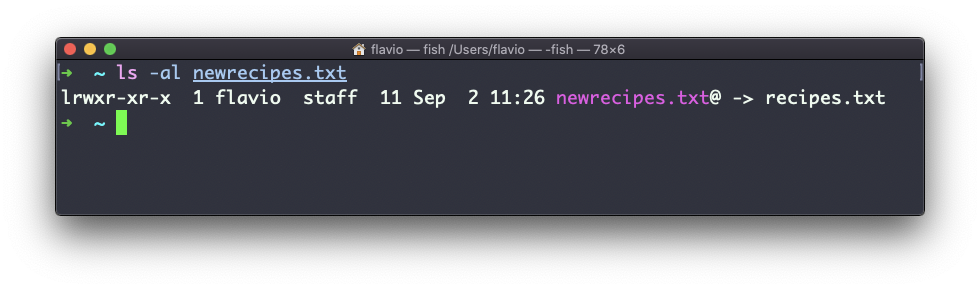
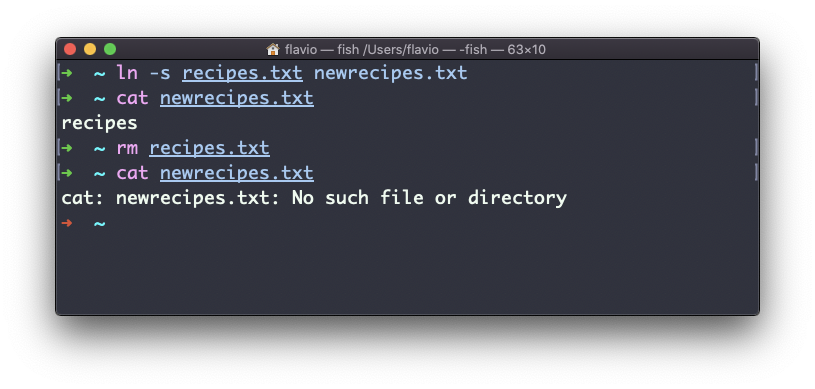
ln -s recipes.txt newrecipes.txt
In this case you can see there's a special l flag when you list the file using ls -al. The file name has a @ at the end, and it's also colored differently if you have colors enabled:
Now if you delete the original file, the links will be broken, and the shell will tell you "No such file or directory" if you try to access it:
gzip commandYou can compress a file using the gzip compression protocol named LZ77 using the gzip command.
Here's the simplest usage:
gzip filename
This will compress the file, and append a .gz extension to it. The original file is deleted.
To prevent this, you can use the -c option and use output redirection to write the output to the filename.gz file:
gzip -c filename > filename.gz
The
-coption specifies that the output will go to the standard output stream, leaving the original file intact.
Or you can use the -k option:
gzip -k filename
There are various levels of compression. The more the compression, the longer it will take to compress (and decompress). Levels range from 1 (fastest, worst compression) to 9 (slowest, better compression), and the default is 6.
You can choose a specific level with the -<NUMBER> option:
gzip -1 filename
You can compress multiple files by listing them:
gzip filename1 filename2
You can compress all the files in a directory, recursively, using the -r option:
gzip -r a_folder
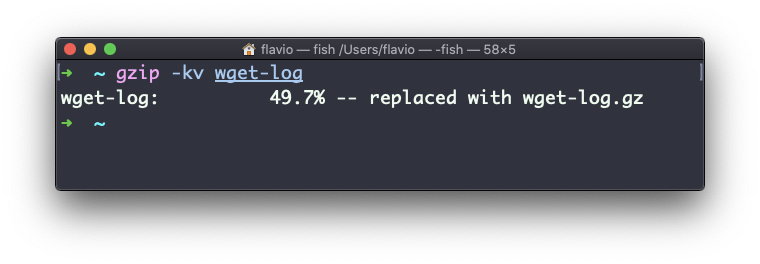
The -v option prints the compression percentage information. Here's an example of it being used along with the -k (keep) option:
gzip can also be used to decompress a file, using the -d option:
gzip -d filename.gz
gunzip commandThe gunzip command is basically equivalent to the gzip command, except the -d option is always enabled by default.
The command can be invoked in this way:
gunzip filename.gz
This will gunzip and will remove the .gz extension, putting the result in the filename file. If that file exists, it will overwrite that.
You can extract to a different filename using output redirection using the -c option:
gunzip -c filename.gz > anotherfilename
tar commandThe tar command is used to create an archive, grouping multiple files in a single file.
Its name comes from the past and means tape archive (back when archives were stored on tapes).
This command creates an archive named archive.tar with the content of file1 and file2:
tar -cf archive.tar file1 file2
The
coption stands for create. Thefoption is used to write to file the archive.
To extract files from an archive in the current folder, use:
tar -xf archive.tar
the
xoption stands for extract.
And to extract them to a specific directory, use:
tar -xf archive.tar -C directory
You can also just list the files contained in an archive:
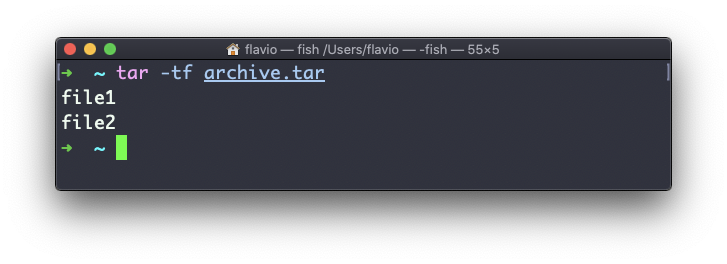
tar is often used to create a compressed archive, gzipping the archive.
This is done using the z option:
tar -czf archive.tar.gz file1 file2
This is just like creating a tar archive, and then running gzip on it.
To unarchive a gzipped archive, you can use gunzip, or gzip -d, and then unarchive it. But tar -xf will recognize it's a gzipped archive, and do it for you:
tar -xf archive.tar.gz
alias commandIt's common to always run a program with a set of options that you like using.
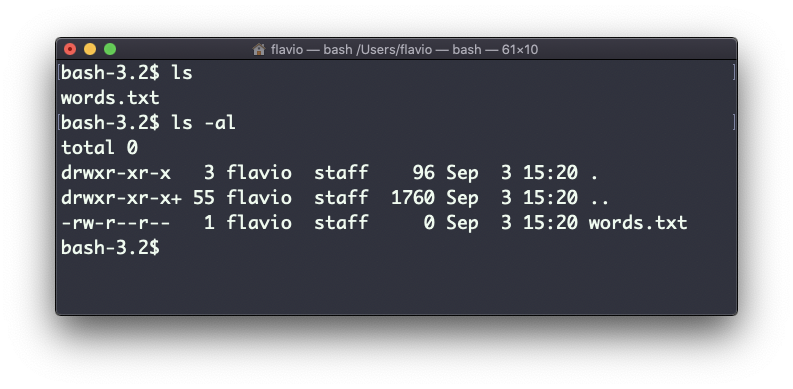
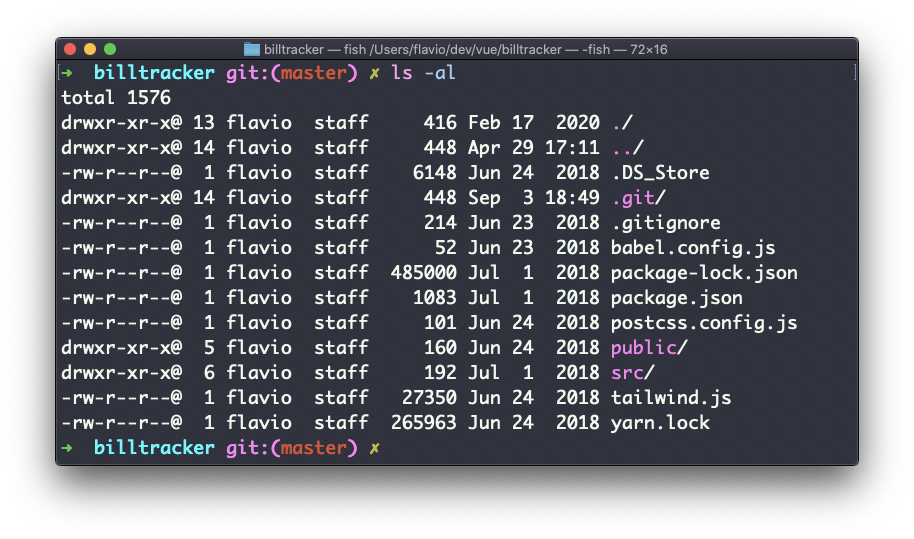
For example, take the ls command. By default it prints very little information:
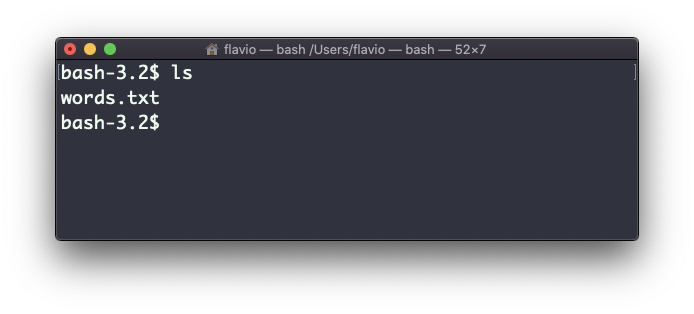
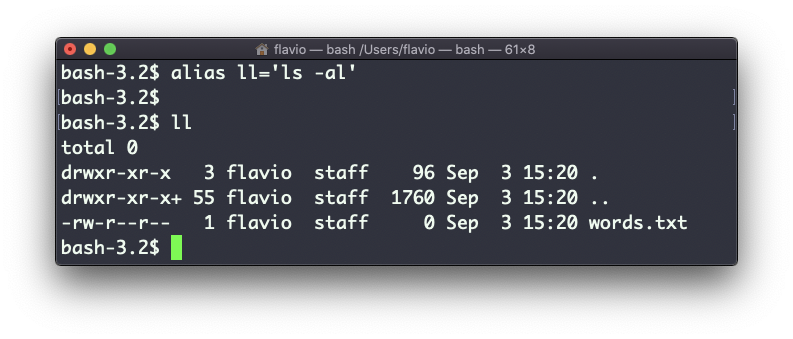
But if you use the -al option it will print something more useful, including the file modification date, the size, the owner, and the permissions. It will also list hidden files (files starting with a .):
You can create a new command, for example I like to call it ll, that is an alias to ls -al.
You do it like this:
alias ll='ls -al'
Once you do, you can call ll just like it was a regular UNIX command:
Now calling alias without any option will list the aliases defined:
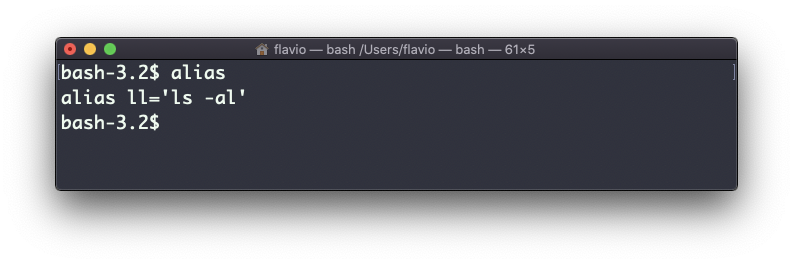
The alias will work until the terminal session is closed.
To make it permanent, you need to add it to the shell configuration. This could be ~/.bashrc or ~/.profile or ~/.bash_profile if you use the Bash shell, depending on the use case.
Be careful with quotes if you have variables in the command: if you use double quotes, the variable is resolved at definition time. If you use use single quotes, it's resolved at invocation time. Those 2 are different:
alias lsthis="ls $PWD"
alias lscurrent='ls $PWD'
$PWD refers to the current folder the shell is in. If you now navigate away to a new folder, lscurrent lists the files in the new folder, whereas lsthis still lists the files in the folder where you were when you defined the alias.
cat commandSimilar to tail in some ways, we have cat. Except cat can also add content to a file, and this makes it super powerful.
In its simplest usage, cat prints a file's content to the standard output:
cat file
You can print the content of multiple files:
cat file1 file2
and using the output redirection operator > you can concatenate the content of multiple files into a new file:
cat file1 file2 > file3
Using >> you can append the content of multiple files into a new file, creating it if it does not exist:
cat file1 file2 >> file3
When you're looking at source code files it's helpful to see the line numbers. You can have cat print them using the -n option:
cat -n file1
You can only add a number to non-blank lines using -b, or you can also remove all the multiple empty lines using -s.
cat is often used in combination with the pipe operator | to feed a file's content as input to another command: cat file1 | anothercommand.
less commandThe less command is one I use a lot. It shows you the content stored inside a file, in a nice and interactive UI.
Usage: less <filename>.
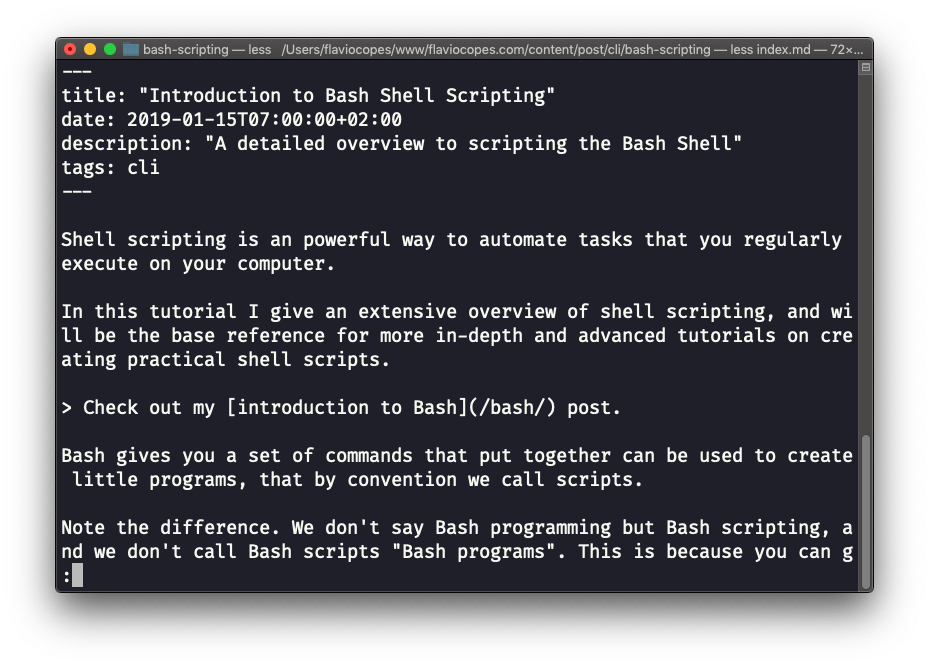
Once you are inside a less session, you can quit by pressing q.
You can navigate the file contents using the up and down keys, or using the space bar and b to navigate page by page. You can also jump to the end of the file pressing G and jump back to the start by pressing g.
You can search contents inside the file by pressing / and typing a word to search. This searches forward. You can search backwards using the ? symbol and typing a word.
This command just visualises the file's content. You can directly open an editor by pressing v. It will use the system editor, which in most cases is vim.
Pressing the F key enters follow mode, or watch mode. When the file is changed by someone else, like from another program, you get to see the changes live.
This doesn't happen by default, and you only see the file version at the time you opened it. You need to press ctrl-C to quit this mode. In this case the behaviour is similar to running the tail -f <filename> command.
You can open multiple files, and navigate through them using :n (to go to the next file) and :p (to go to the previous).
tail commandThe best use case of tail in my opinion is when called with the -f option. It opens the file at the end, and watches for file changes.
Any time there is new content in the file, it is printed in the window. This is great for watching log files, for example:
tail -f /var/log/system.log
To exit, press ctrl-C.
You can print the last 10 lines in a file:
tail -n 10 <filename>
You can print the whole file content starting from a specific line using + before the line number:
tail -n +10 <filename>
tail can do much more and as always my advice is to check man tail.
wc commandThe wc command gives us useful information about a file or input it receives via pipes.
echo test >> test.txt
wc test.txt
1       1       5 test.txt
Example via pipes, we can count the output of running the ls -al command:
ls -al | wc
6      47     284
The first column returned is the number of lines. The second is the number of words. The third is the number of bytes.
We can tell it to just count the lines:
wc -l test.txt
or just the words:
wc -w test.txt
or just the bytes:
wc -c test.txt
Bytes in ASCII charsets equate to characters. But with non-ASCII charsets, the number of characters might differ because some characters might take multiple bytes (for example this happens in Unicode).
In this case the -m flag will help you get the correct value:
wc -m test.txt
grep commandThe grep command is a very useful tool. When you master it, it will help you tremendously in your day to day coding.
If you're wondering,
grepstands for global regular expression print.
You can use grep to search in files, or combine it with pipes to filter the output of another command.
For example here's how we can find the occurences of the document.getElementById line in the index.md file:
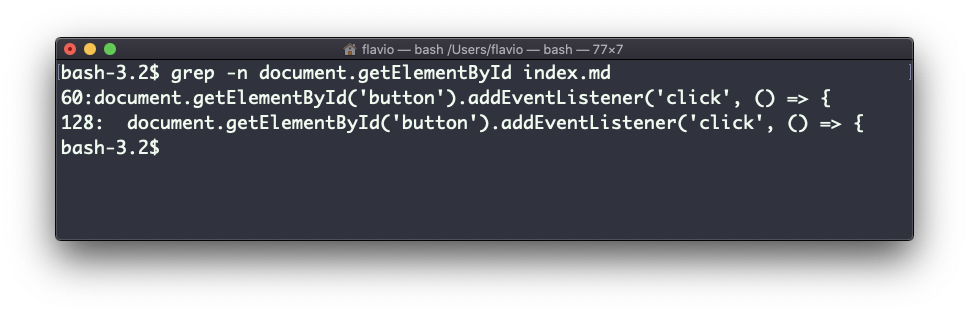
grep -n document.getElementById index.md
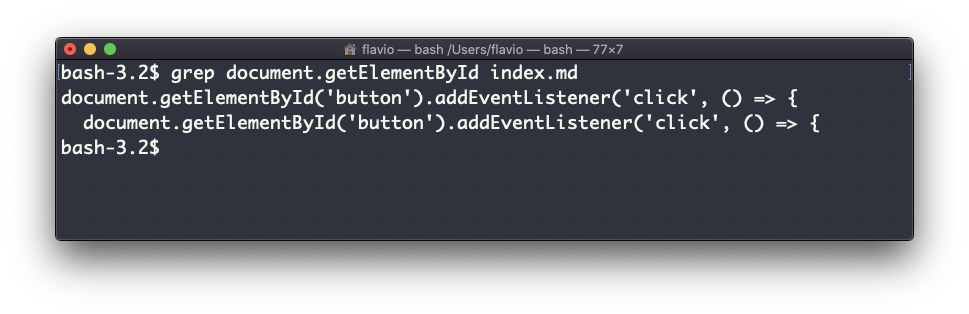
Using the -n option it will show the line numbers:
grep -n document.getElementById index.md
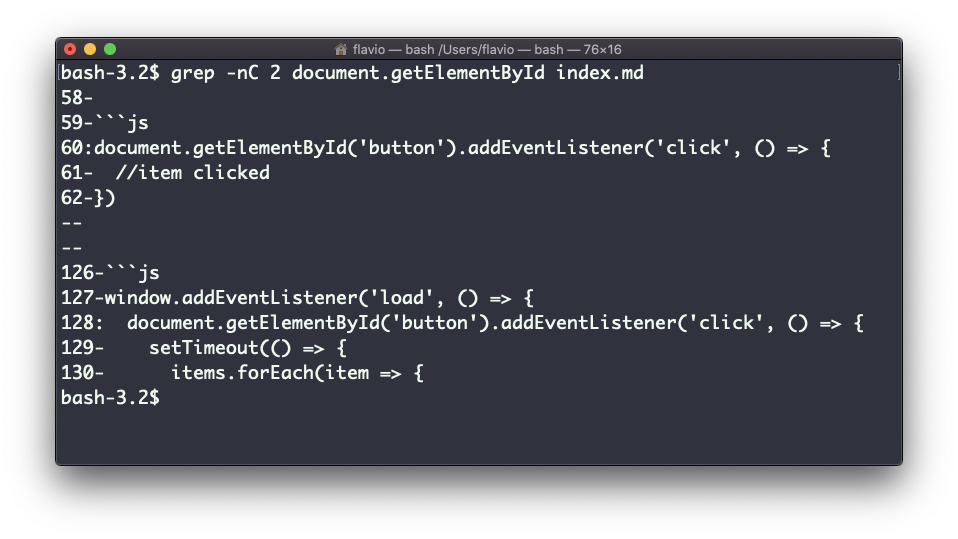
One very useful thing is to tell grep to print 2 lines before and 2 lines after the matched line to give you more context. That's done using the -C option, which accepts a number of lines:
grep -nC 2 document.getElementById index.md
Search is case sensitive by default. Use the -i flag to make it insensitive.
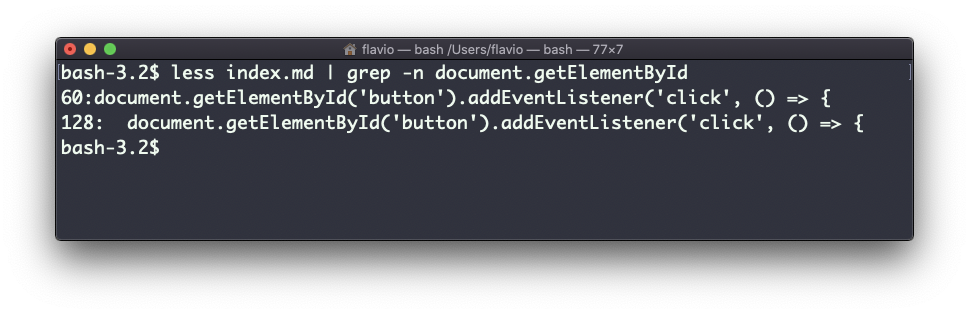
As mentioned, you can use grep to filter the output of another command. We can replicate the same functionality as above using:
less index.md | grep -n document.getElementById
The search string can be a regular expression, and this makes grep very powerful.
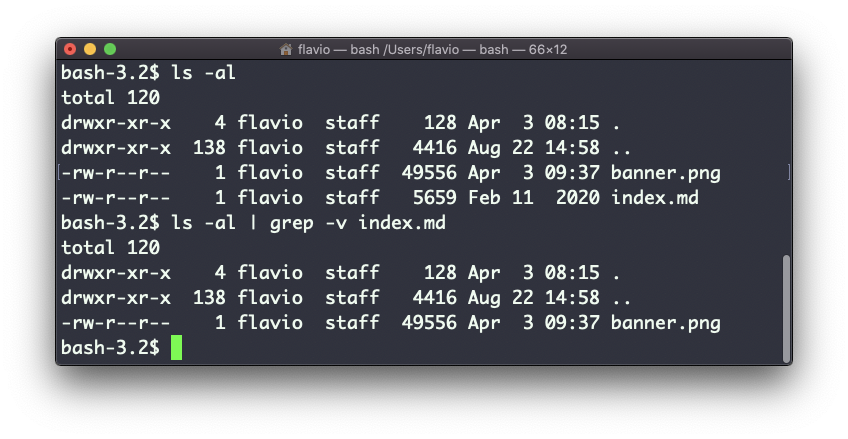
Another thing you might find very useful is to invert the result, excluding the lines that match a particular string, using the -v option:
sort commandSuppose you have a text file which contains the names of dogs:
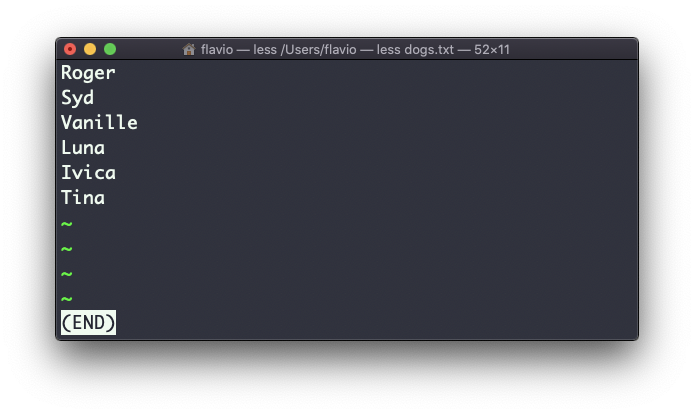
This list is unordered.
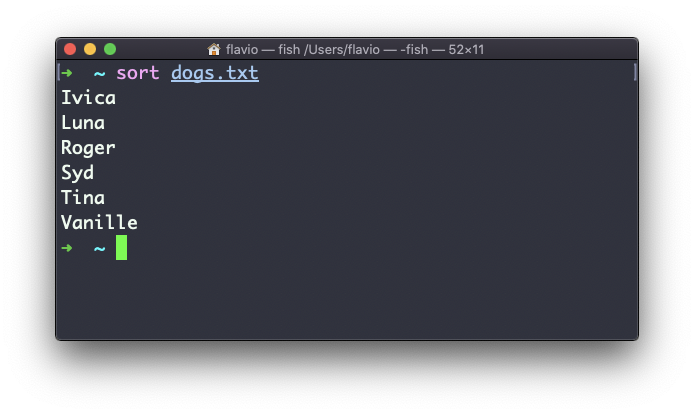
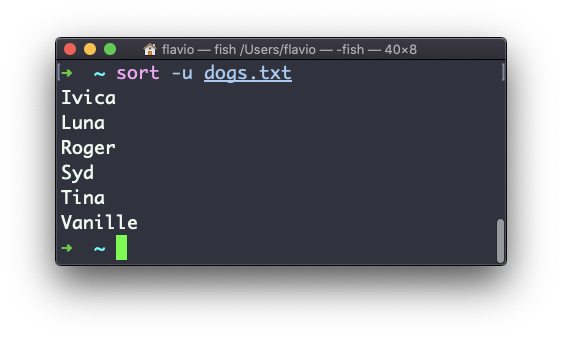
The sort command helps you sort them by name:
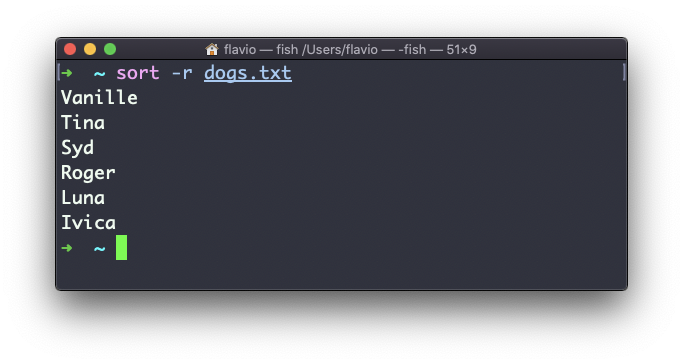
Use the r option to reverse the order:
Sorting by default is case sensitive, and alphabetic. Use the --ignore-case option to sort case insensitive, and the -n option to sort using a numeric order.
If the file contains duplicate lines:
You can use the -u option to remove them:
sort does not just work on files, as many UNIX commands do – it also works with pipes. So you can use it on the output of another command. For example you can order the files returned by ls with:
ls | sort
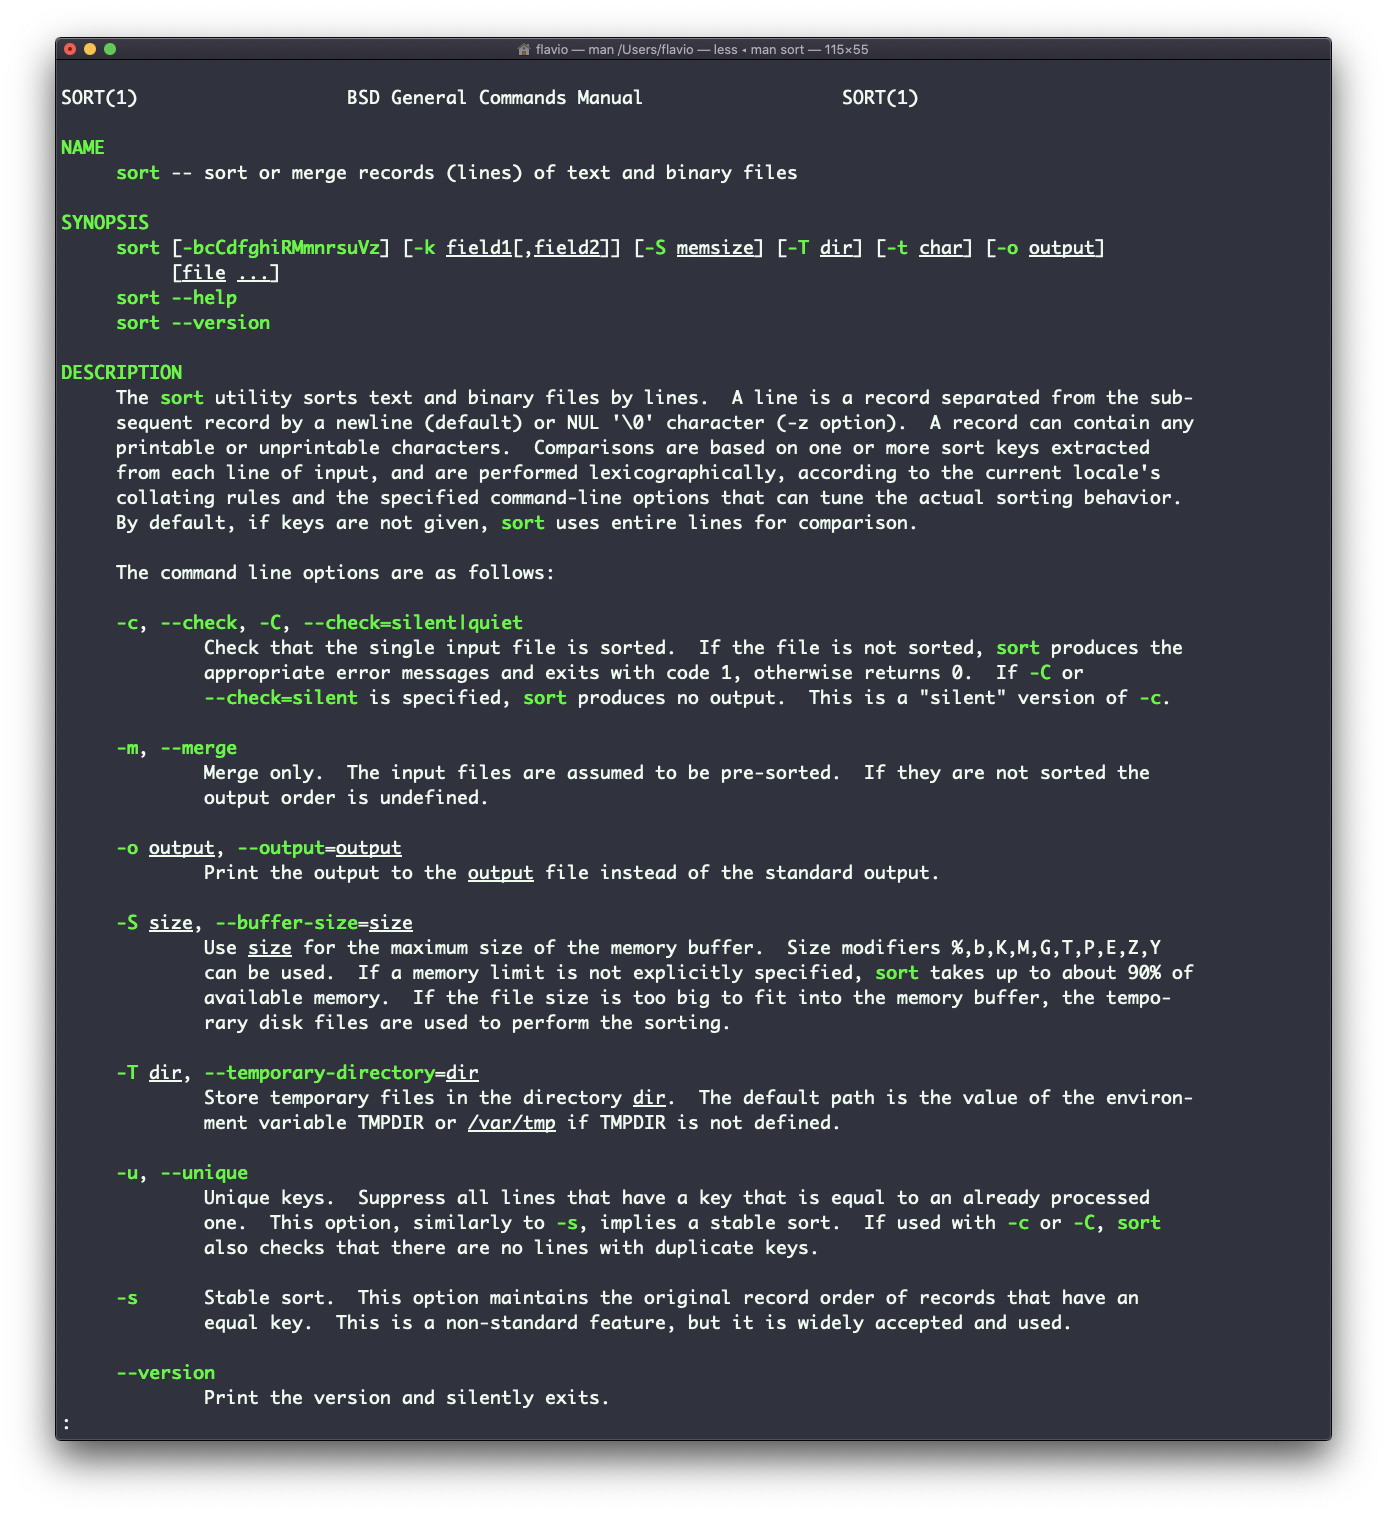
sort is very powerful and has lots more options, which you can explore by calling man sort.
uniq commanduniq is a command that helps you sort lines of text.
You can get those lines from a file, or using pipes from the output of another command:
uniq dogs.txt

ls | uniq
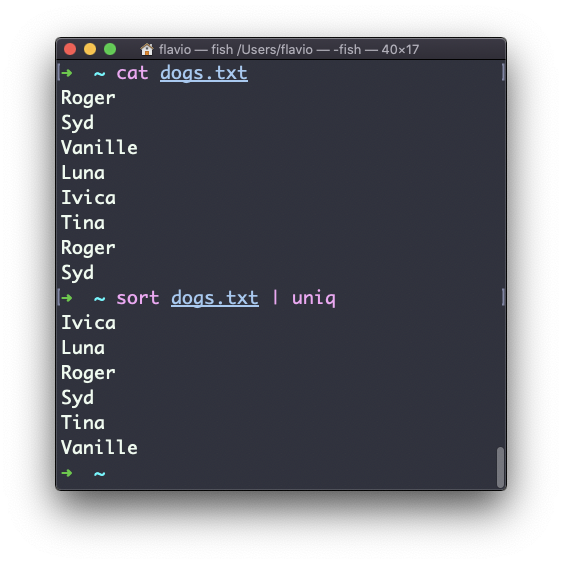
You need to consider this key thing: uniq will only detect adjacent duplicate lines.
This implies that you will most likely use it along with sort:
sort dogs.txt | uniq
The sort command has its own way to remove duplicates with the -u (unique) option. But uniq has more power.
By default it removes duplicate lines:
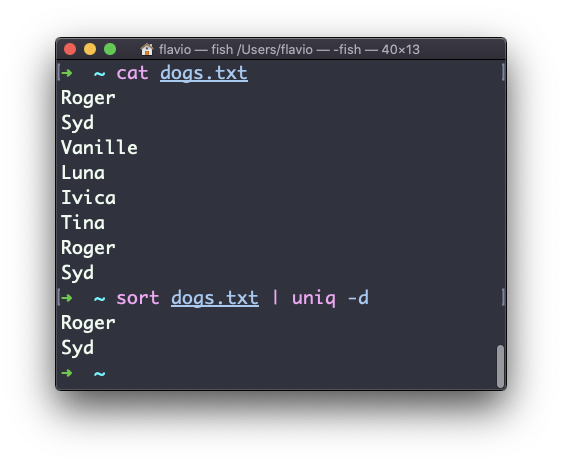
You can tell it to only display duplicate lines, for example, with the -d option:
sort dogs.txt | uniq -d
You can use the -u option to only display non-duplicate lines:

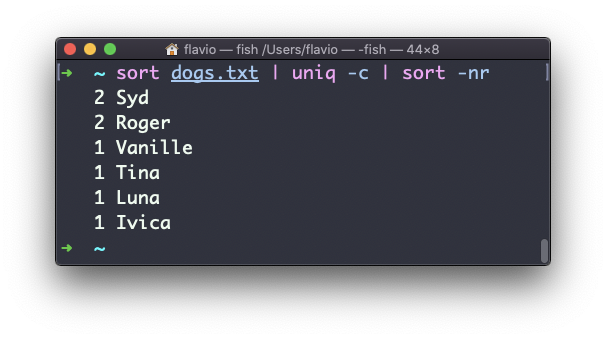
You can count the occurrences of each line with the -c option:

Use the special combination:
sort dogs.txt | uniq -c | sort -nr
to then sort those lines by most frequent:
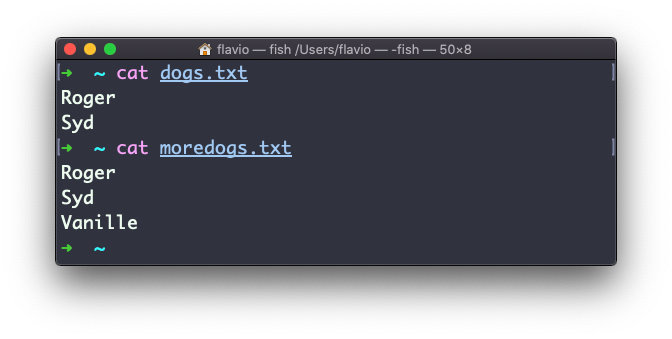
diff commanddiff is a handy command. Suppose you have 2 files, which contain almost the same information, but you can't find the difference between the two.
diff will process the files and will tell you what's the difference.
Suppose you have 2 files: dogs.txt and moredogs.txt. The difference is that moredogs.txt contains one more dog name:
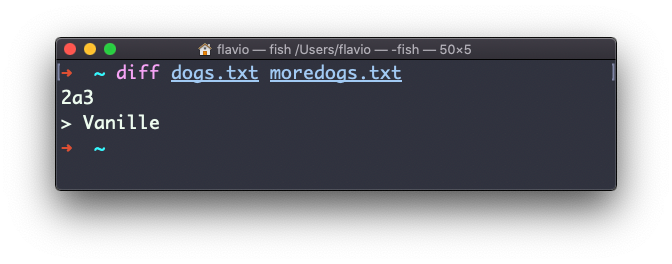
diff dogs.txt moredogs.txt will tell you the second file has one more line, line 3 with the line Vanille:
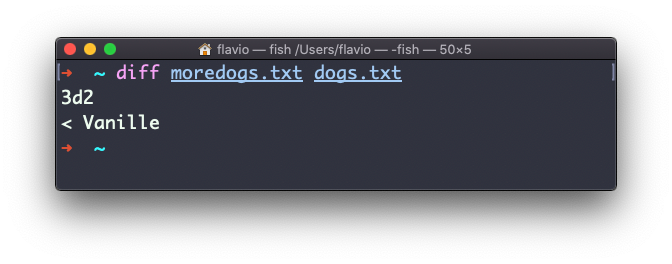
If you invert the order of the files, it will tell you that the second file is missing line 3, whose content is Vanille:
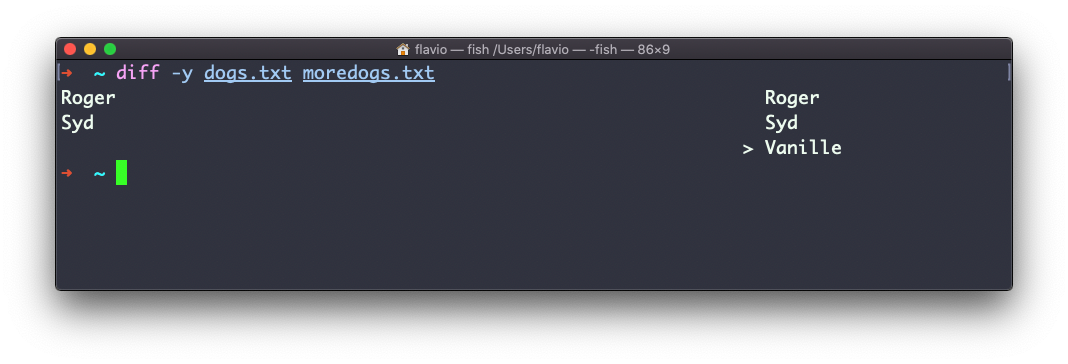
Using the -y option will compare the 2 files line by line:
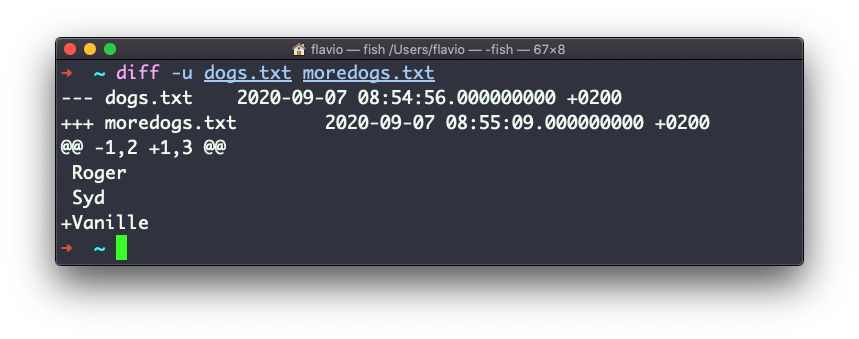
The -u option however will be more familiar to you, because that's the same used by the Git version control system to display differences between versions:
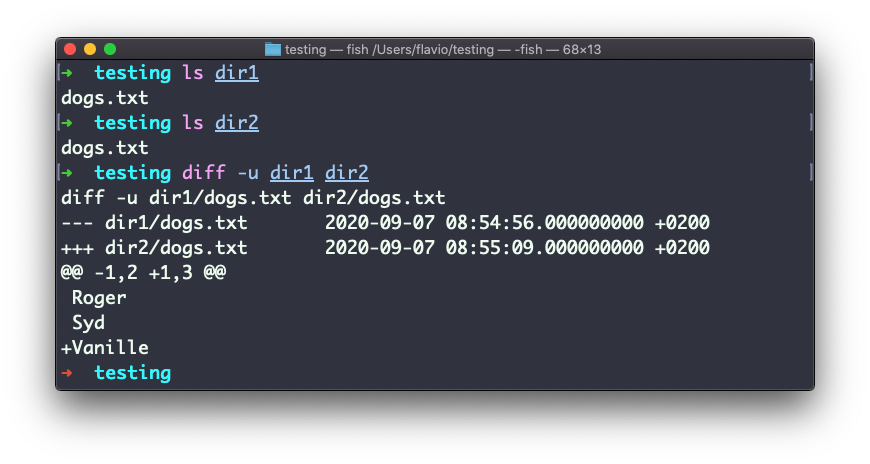
Comparing directories works in the same way. You must use the -r option to compare recursively (going into subdirectories):
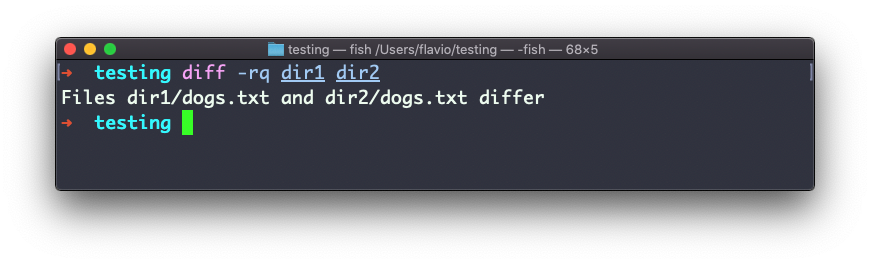
In case you're interested in which files differ, rather than the content, use the r and q options:
There are many more options you can explore in the man page by running man diff:
echo commandThe echo command does one simple job: it prints to the output the argument passed to it.
This example:
echo "hello"
will print hello to the terminal.
We can append the output to a file:
echo "hello" >> output.txt
We can interpolate environment variables:
echo "The path variable is $PATH"

Beware that special characters need to be escaped with a backslash \. $ for example:
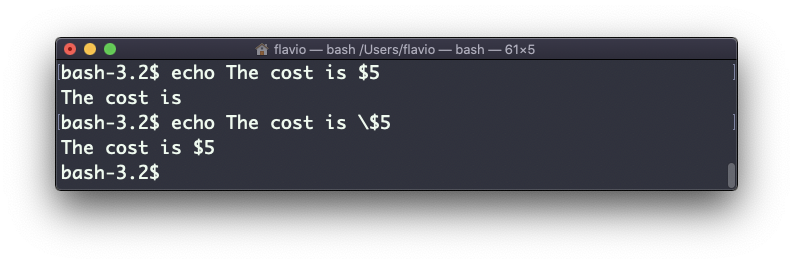
This is just the start. We can do some nice things when it comes to interacting with the shell features.
We can echo the files in the current folder:
echo *
We can echo the files in the current folder that start with the letter o:
echo o*
Any valid Bash (or any shell you are using) command and feature can be used here.
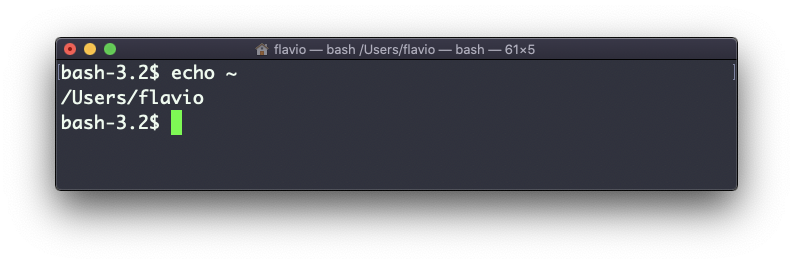
You can print your home folder path:
echo ~
You can also execute commands, and print the result to the standard output (or to file, as you saw):
echo $(ls -al)
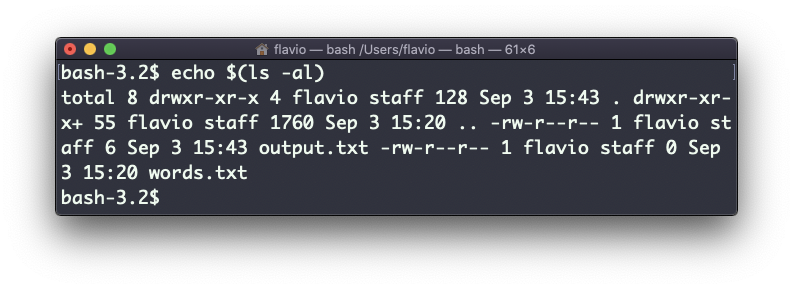
Note that whitespace is not preserved by default. You need to wrap the command in double quotes to do so:
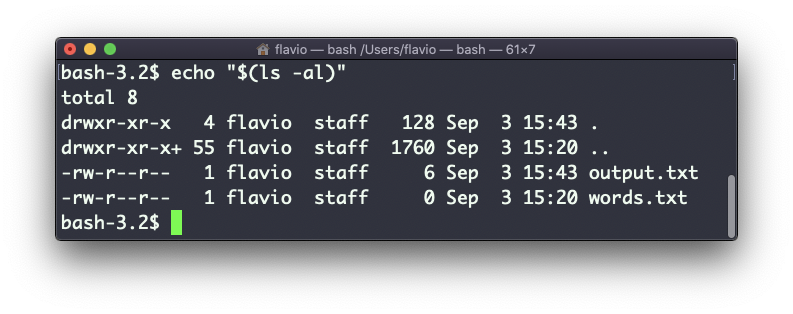
You can generate a list of strings, for example ranges:
echo {1..5}

chown commandEvery file/directory in an Operating System like Linux or macOS (and every UNIX system in general) has an owner.
The owner of a file can do everything with it. It can decide the fate of that file.
The owner (and the root user) can change the owner to another user, too, using the chown command:
chown <owner> <file>
Like this:
chown flavio test.txt
For example if you have a file that's owned by root, you can't write to it as another user:
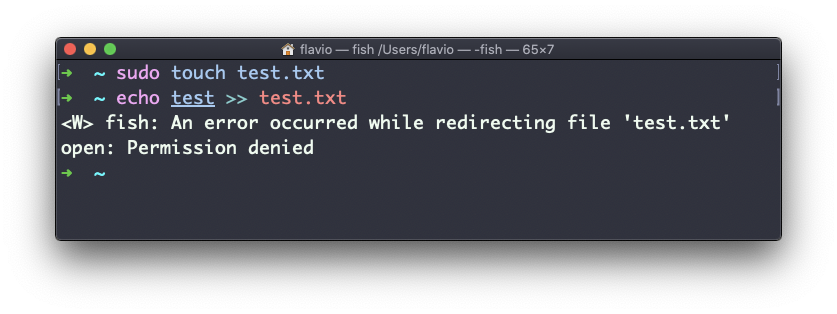
You can use chown to transfer the ownership to you:

It's rather common to need to change the ownership of a directory, and recursively all the files contained, plus all the subdirectories and the files contained in them, too.
You can do so using the -R flag:
chown -R <owner> <file>
Files/directories don't just have an owner, they also have a group. Through this command you can change that simultaneously while you change the owner:
chown <owner>:<group> <file>
Example:
chown flavio:users test.txt
You can also just change the group of a file using the chgrp command:
chgrp <group> <filename>
chmod commandEvery file in the Linux / macOS Operating Systems (and UNIX systems in general) has 3 permissions: read, write, and execute.
Go into a folder, and run the ls -al command.
The weird strings you see on each file line, like drwxr-xr-x, define the permissions of the file or folder.
Let's dissect it.
The first letter indicates the type of file:
- means it's a normal filed means it's a directoryl means it's a linkThen you have 3 sets of values:
Those sets are composed by 3 values. rwx means that specific persona has read, write and execution access. Anything that is removed is swapped with a -, which lets you form various combinations of values and relative permissions: rw-, r--, r-x, and so on.
You can change the permissions given to a file using the chmod command.
chmod can be used in 2 ways. The first is using symbolic arguments, the second is using numeric arguments. Let's start with symbols first, which is more intuitive.
You type chmod followed by a space, and a letter:
a stands for allu stands for userg stands for groupo stands for othersThen you type either + or - to add a permission, or to remove it. Then you enter one or more permission symbols (r, w, x).
All followed by the file or folder name.
Here are some examples:
chmod a+r filename #everyone can now read
chmod a+rw filename #everyone can now read and write
chmod o-rwx filename #others (not the owner, not in the same group of the file) cannot read, write or execute the file
You can apply the same permissions to multiple personas by adding multiple letters before the +/-:
chmod og-r filename #other and group can't read any more
In case you are editing a folder, you can apply the permissions to every file contained in that folder using the -r (recursive) flag.
Numeric arguments are faster but I find them hard to remember when you are not using them day to day. You use a digit that represents the permissions of the persona. This number value can be a maximum of 7, and it's calculated in this way:
1 if has execution permission2 if has write permission4 if has read permissionThis gives us 4 combinations:
0 no permissions1 can execute2 can write3 can write, execute4 can read5 can read, execute6 can read, write7 can read, write and executeWe use them in pairs of 3, to set the permissions of all the 3 groups altogether:
chmod 777 filename
chmod 755 filename
chmod 644 filename
umask commandWhen you create a file, you don't have to decide permissions up front. Permissions have defaults.
Those defaults can be controlled and modified using the umask command.
Typing umask with no arguments will show you the current umask, in this case 0022:
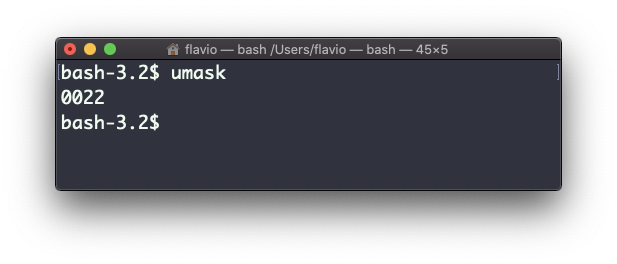
What does 0022 mean? That's an octal value that represents the permissions.
Another common value is 0002.
Use umask -S to see a human-readable notation:
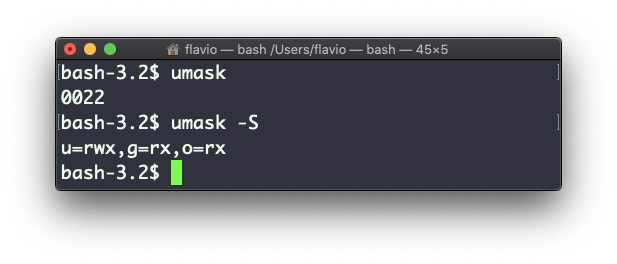
In this case, the user (u), owner of the file, has read, write and execution permissions on files.
Other users belonging to the same group (g) have read and execution permission, same as all the other users (o).
In the numeric notation, we typically change the last 3 digits.
Here's a list that gives a meaning to the number:
0 read, write, execute1 read and write2 read and execute3 read only4 write and execute5 write only6 execute only7 no permissionsNote that this numeric notation differs from the one we use in chmod.
We can set a new value for the mask setting the value in numeric format:
umask 002
or you can change a specific role's permission:
umask g+r
du commandThe du command will calculate the size of a directory as a whole:
du
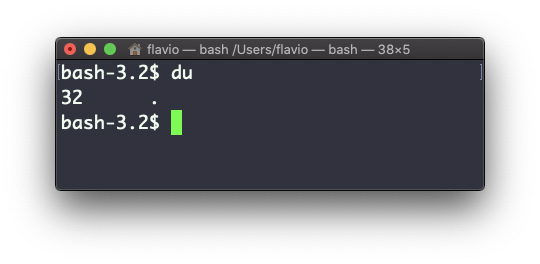
The 32 number here is a value expressed in bytes.
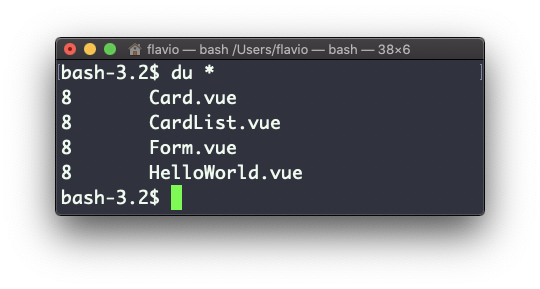
Running du * will calculate the size of each file individually:
You can set du to display values in MegaBytes using du -m, and GigaBytes using du -g.
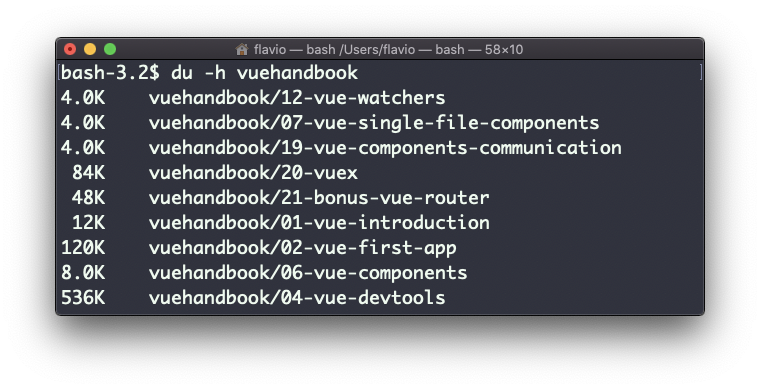
The -h option will show a human-readable notation for sizes, adapting to the size:
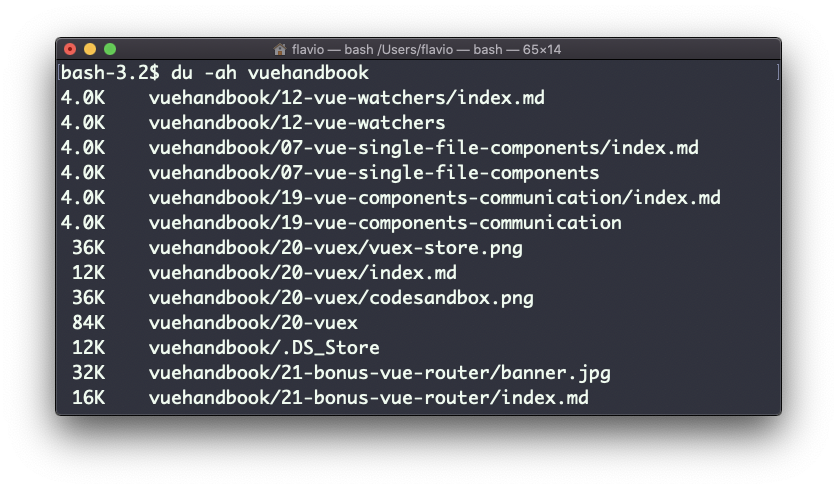
Adding the -a option will print the size of each file in the directories, too:
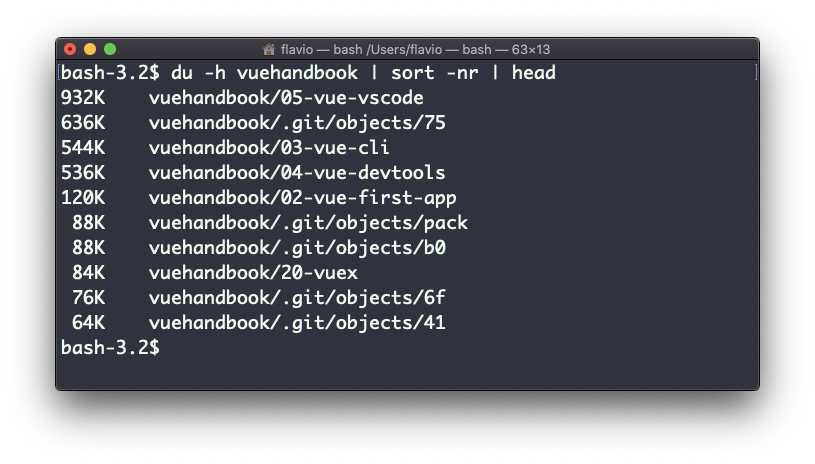
A handy thing is to sort the directories by size:
du -h <directory> | sort -nr
and then piping to head to only get the first 10 results:
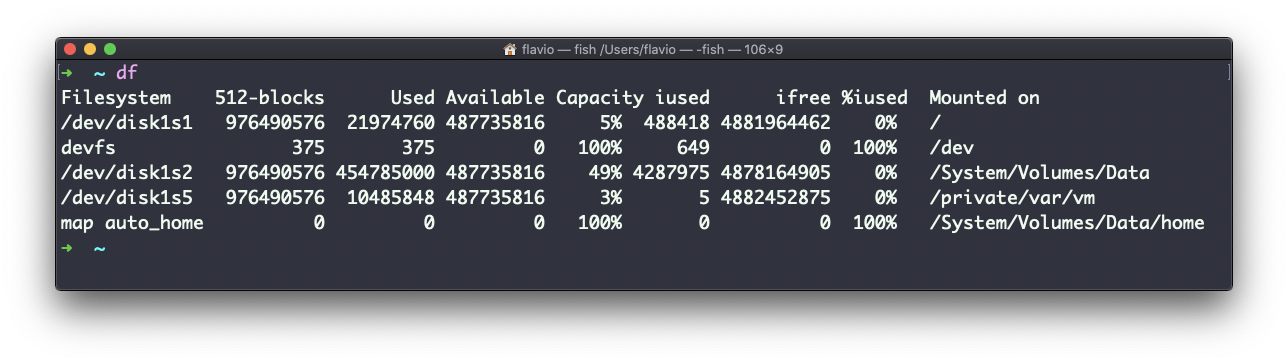
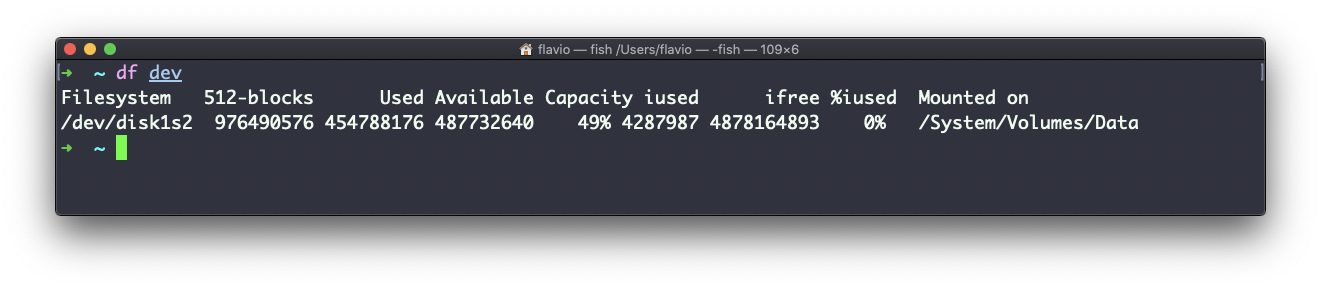
df commandThe df command is used to get disk usage information.
Its basic form will print information about the volumes mounted:
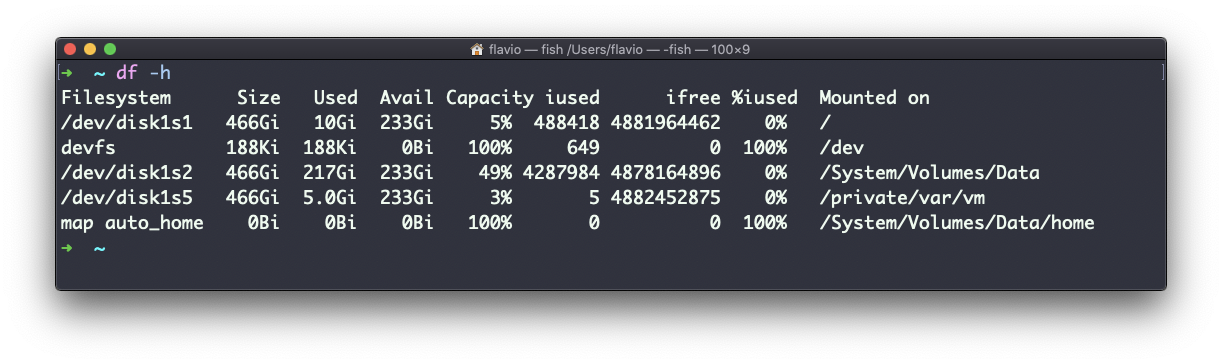
Using the -h option (df -h) will show those values in a human-readable format:
You can also specify a file or directory name to get information about the specific volume it lives on:
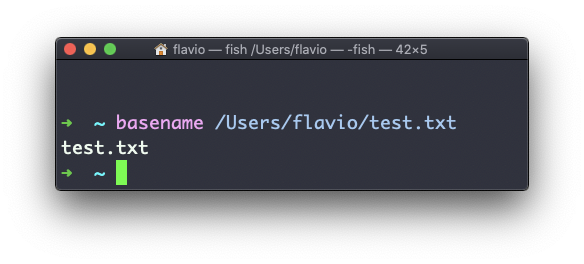
basename commandSuppose you have a path to a file, for example /Users/flavio/test.txt.
Running
basename /Users/flavio/test.txt
will return the test.txt string:
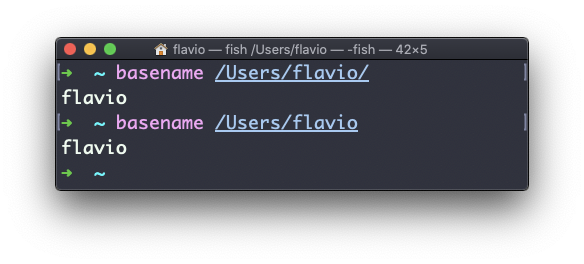
If you run basename on a path string that points to a directory, you will get the last segment of the path. In this example, /Users/flavio is a directory:
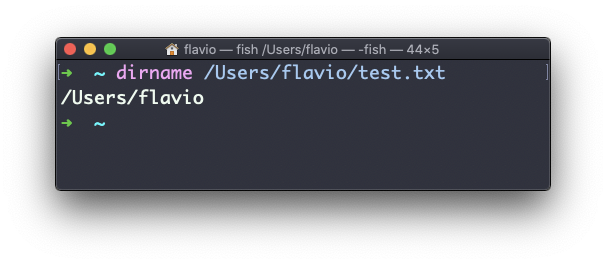
dirname commandSuppose you have a path to a file, for example /Users/flavio/test.txt.
Running
dirname /Users/flavio/test.txt
will return the /Users/flavio string:
ps commandYour computer is running tons of different processes at all times.
You can inspect them all using the ps command:
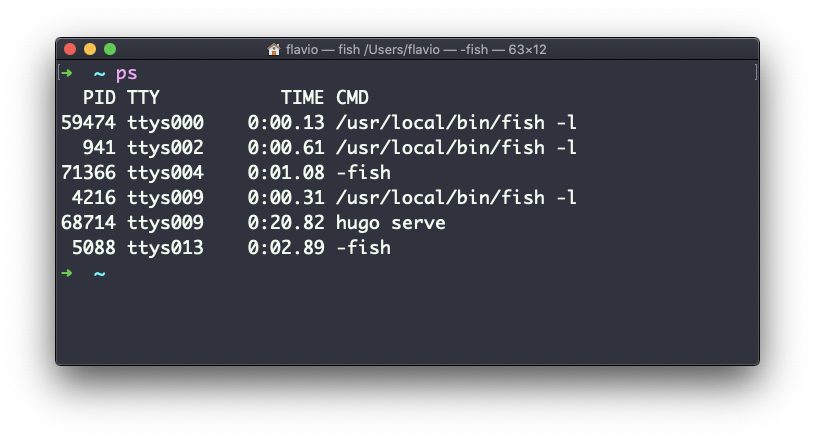
This is the list of user-initiated processes currently running in the current session.
Here I have a few fish shell instances, mostly opened by VS Code inside the editor, and an instance of Hugo running the development preview of a site.
Those are just the commands assigned to the current user. To list all processes we need to pass some options to ps.
The most common one I use is ps ax:
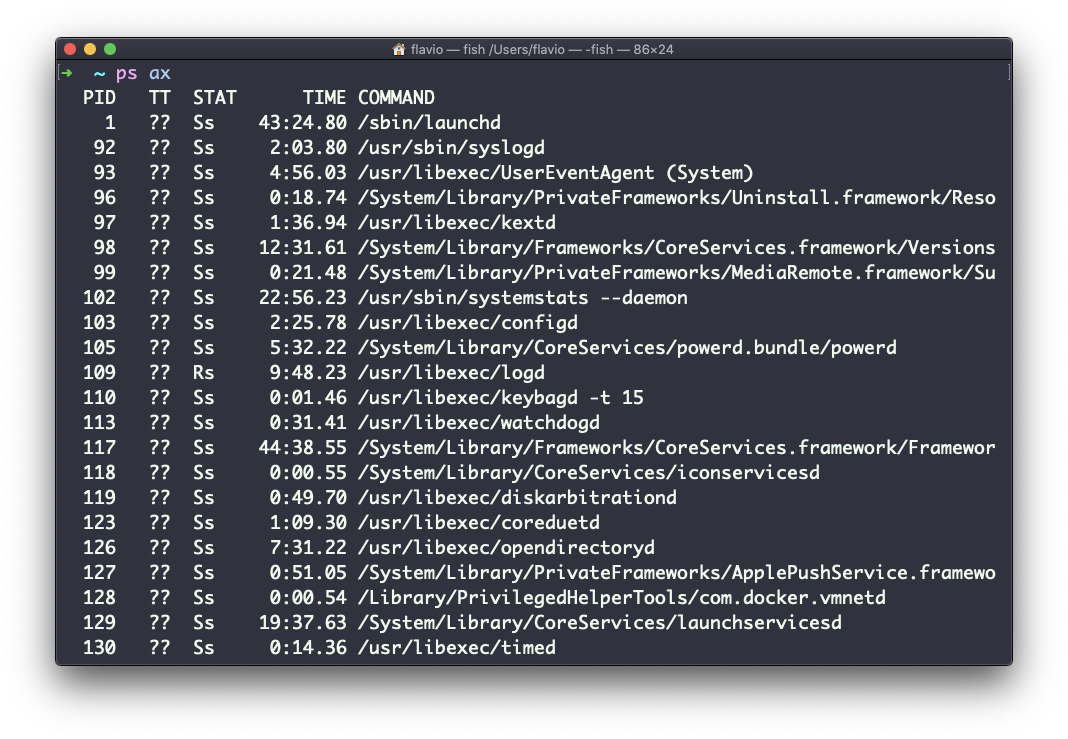
The
aoption is used to also list other users' processes, not just your own.xshows processes not linked to any terminal (not initiated by users through a terminal).
As you can see, the longer commands are cut. Use the command ps axww to continue the command listing on a new line instead of cutting it:
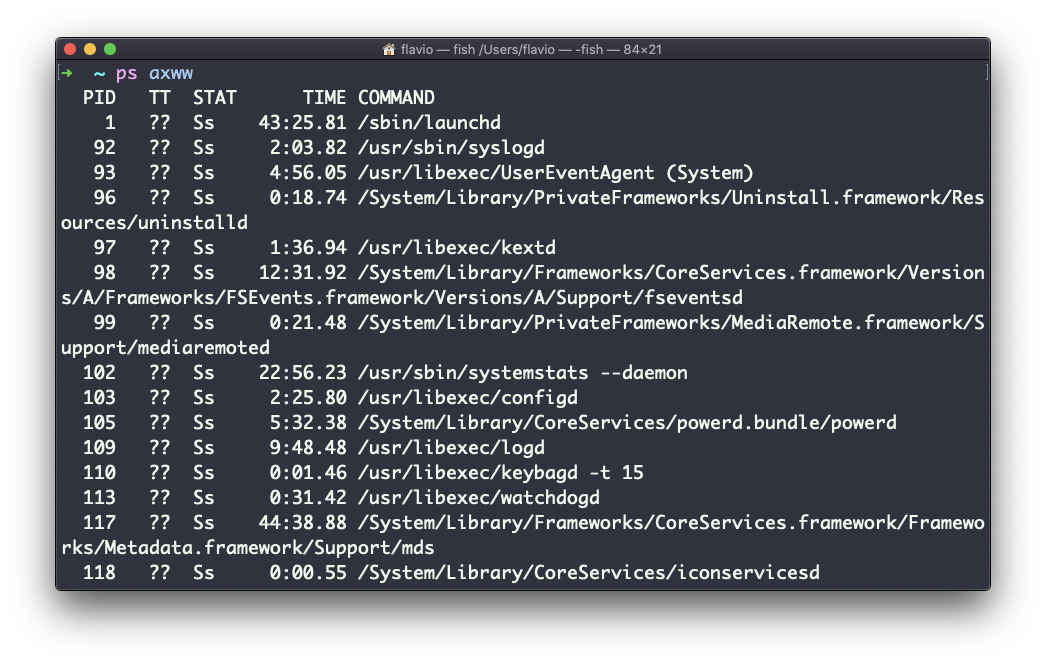
We need to specify
w2 times to apply this setting (it's not a typo).
You can search for a specific process combining grep with a pipe, like this:
ps axww | grep "Visual Studio Code"

The columns returned by ps represent some key information.
The first information is PID, the process ID. This is key when you want to reference this process in another command, for example to kill it.
Then we have TT that tells us the terminal id used.
Then STAT tells us the state of the process:
I a process that is idle (sleeping for longer than about 20 seconds)
R a runnable process
S a process that is sleeping for less than about 20 seconds
T a stopped process
U a process in uninterruptible wait
Z a dead process (a zombie)
If you have more than one letter, the second represents further information, which can be very technical.
It's common to have + which indicates that the process is in the foreground in its terminal. s means the process is a session leader.
TIME tells us how long the process has been running.
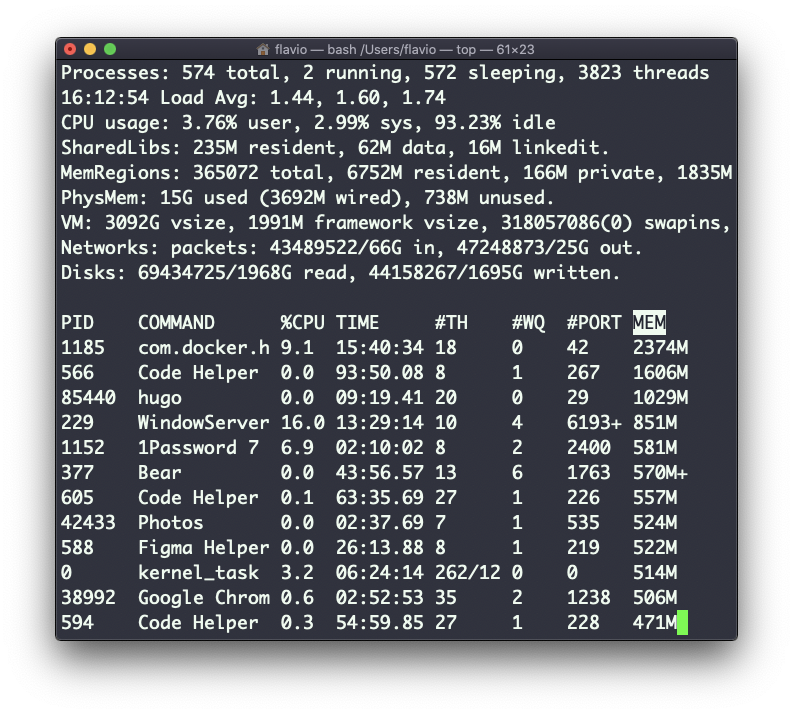
top commandThe top command is used to display dynamic real-time information about running processes in the system.
It's really handy to understand what is going on.
Its usage is simple – you just type top, and the terminal will be fully immersed in this new view:
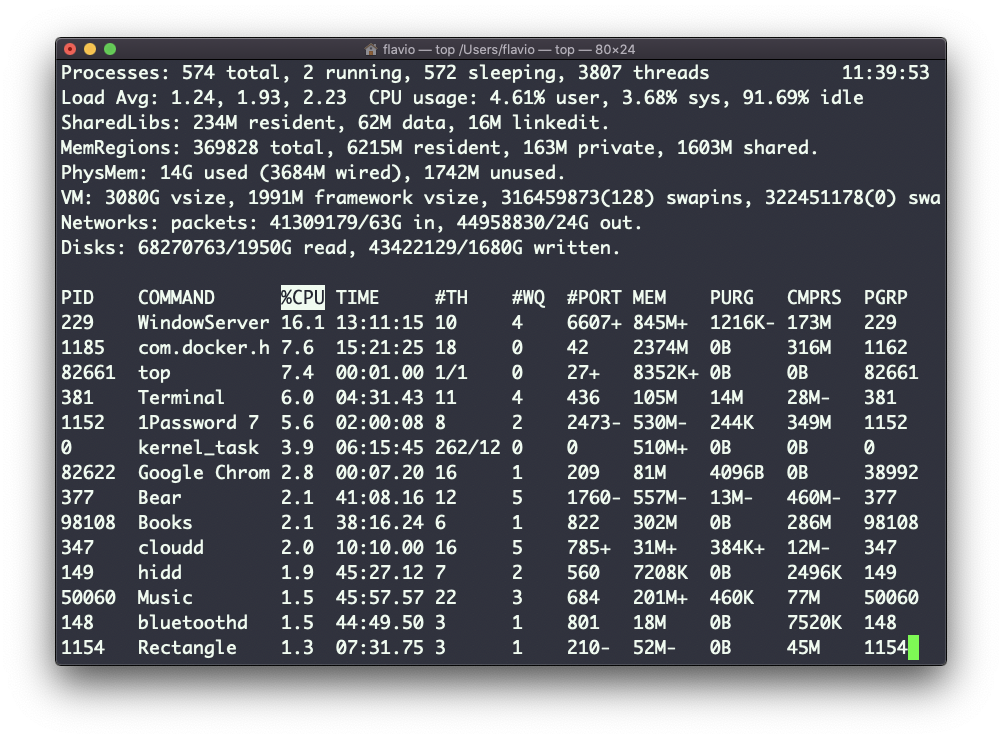
The process is long-running. To quit, you can type the q letter or ctrl-C.
There's a lot of information being given to us: the number of processes, how many are running or sleeping, the system load, the CPU usage, and a lot more.
Below, the list of processes taking the most memory and CPU is constantly updated.
By default, as you can see from the %CPU column highlighted, they are sorted by the CPU used.
You can add a flag to sort processes by memory utilized:
top -o mem
kill commandLinux processes can receive signals and react to them.
That's one way we can interact with running programs.
The kill program can send a variety of signals to a program.
It's not just used to terminate a program, like the name would suggest, but that's its main job.
We use it in this way:
kill <PID>
By default, this sends the TERM signal to the process id specified.
We can use flags to send other signals, including:
kill -HUP <PID>
kill -INT <PID>
kill -KILL <PID>
kill -TERM <PID>
kill -CONT <PID>
kill -STOP <PID>
HUP means hang up. It's sent automatically when a terminal window that started a process is closed before terminating the process.
INT means interrupt, and it sends the same signal used when we press ctrl-C in the terminal, which usually terminates the process.
KILL is not sent to the process, but to the operating system kernel, which immediately stops and terminates the process.
TERM means terminate. The process will receive it and terminate itself. It's the default signal sent by kill.
CONT means continue. It can be used to resume a stopped process.
STOP is not sent to the process, but to the operating system kernel, which immediately stops (but does not terminate) the process.
You might see numbers used instead, like kill -1 <PID>. In this case,
1 corresponds to HUP.
2 corresponds to INT.
9 corresponds to KILL.
15 corresponds to TERM.
18 corresponds to CONT.
15 corresponds to STOP.
killall commandSimilar to the kill command, killall will send the signal to multiple processes at once instead of sending a signal to a specific process id.
This is the syntax:
killall <name>
where name is the name of a program. For example you can have multiple instances of the top program running, and killall top will terminate them all.
You can specify the signal, like with kill (and check the kill tutorial to read more about the specific kinds of signals we can send), for example:
killall -HUP top
jobs commandWhen we run a command in Linux / macOS, we can set it to run in the background using the & symbol after the command.
For example we can run top in the background:
top &
This is very handy for long-running programs.
We can get back to that program using the fg command. This works fine if we just have one job in the background, otherwise we need to use the job number: fg 1, fg 2 and so on.
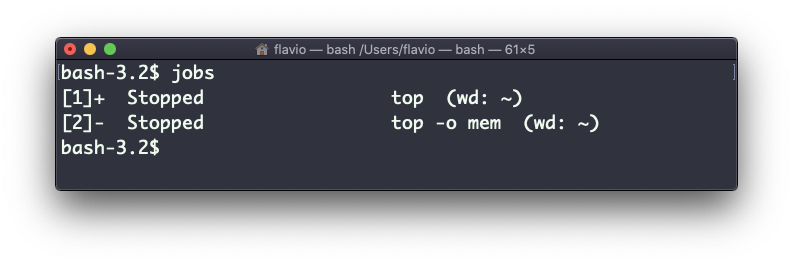
To get the job number, we use the jobs command.
Say we run top & and then top -o mem &, so we have 2 top instances running. jobs will tell us this:

Now we can switch back to one of those using fg <jobid>. To stop the program again we can hit cmd-Z.
Running jobs -l will also print the process id of each job.
bg commandWhen a command is running you can suspend it using ctrl-Z.
The command will immediately stop, and you get back to the shell terminal.
You can resume the execution of the command in the background, so it will keep running but it will not prevent you from doing other work in the terminal.
In this example I have 2 commands stopped:

I can run bg 1 to resume in the background the execution of the job #1.
I could have also said bg without any option, as the default is to pick the job #1 in the list.
fg commandWhen a command is running in the background, because you started it with & at the end (example: top & or because you put it in the background with the bg command), you can put it to the foreground using fg.
Running
fg
will resume in the foreground the last job that was suspended.
You can also specify which job you want to resume to the foreground passing the job number, which you can get using the jobs command.
Running fg 2 will resume job #2:
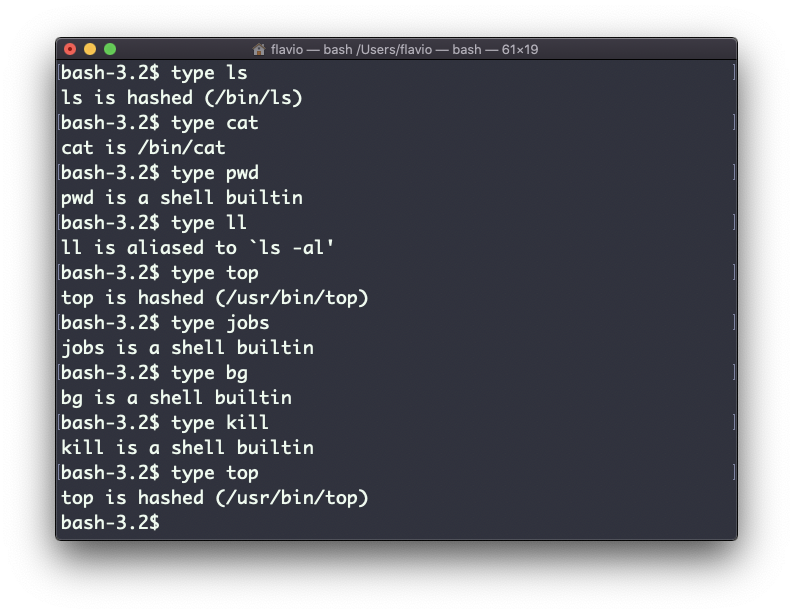
type commandA command can be one of those 4 types:
The type command can help figure this out, in case we want to know or we're just curious. It will tell you how the command will be interpreted.
The output will depend on the shell used. This is Bash:
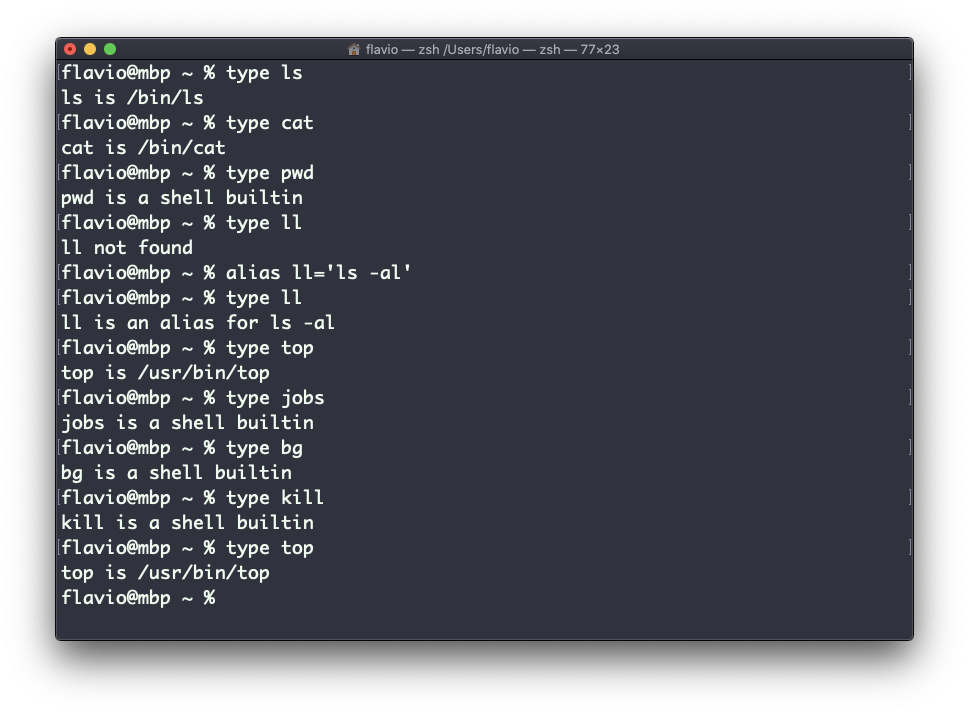
This is Zsh:
This is Fish:
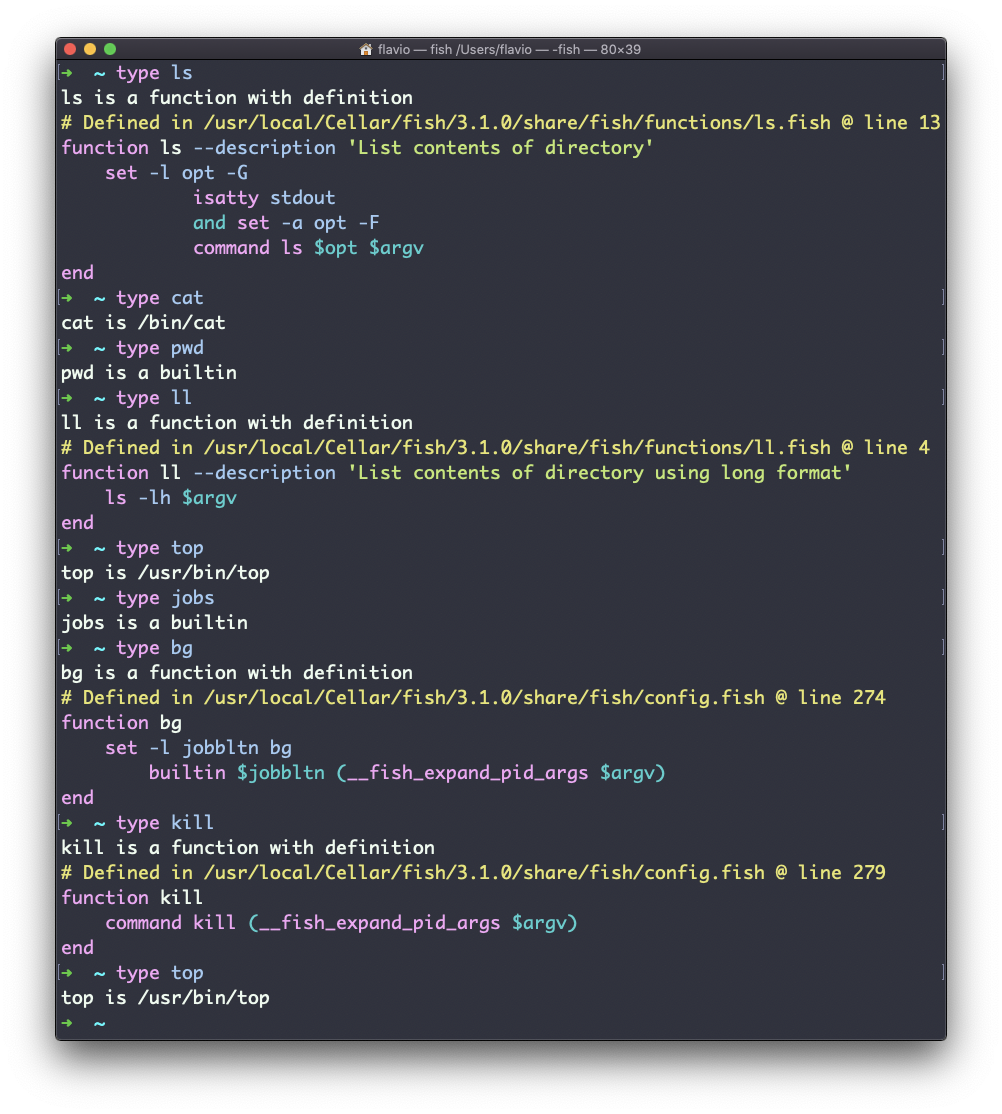
One of the most interesting things here is that for aliases it will tell you what it is aliasing to. You can see the ll alias, in the case of Bash and Zsh, but Fish provides it by default, so it will tell you it's a built-in shell function.
which commandSuppose you have a command you can execute, because it's in the shell path, but you want to know where it is located.
You can do so using which. The command will return the path to the command specified:
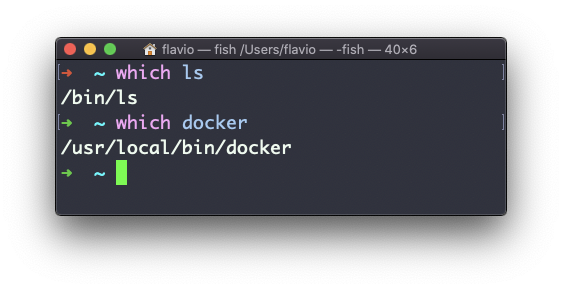
which will only work for executables stored on disk, not aliases or built-in shell functions.
nohup commandSometimes you have to run a long-lived process on a remote machine, and then you need to disconnect.
Or you simply want to prevent the command from being halted if there's any network issue between you and the server.
The way to make a command run even after you log out or close the session to a server is to use the nohup command.
Use nohup <command> to let the process continue working even after you log out.
xargs commandThe xargs command is used in a UNIX shell to convert input from standard input into arguments to a command.
In other words, through the use of xargs the output of a command is used as the input of another command.
Here's the syntax you will use:
command1 | xargs command2
We use a pipe (|) to pass the output to xargs. That will take care of running the command2 command, using the output of command1 as its argument(s).
Let's do a simple example. You want to remove some specific files from a directory. Those files are listed inside a text file.
We have 3 files: file1, file2, file3.
In todelete.txt we have a list of files we want to delete, in this example file1 and file3:
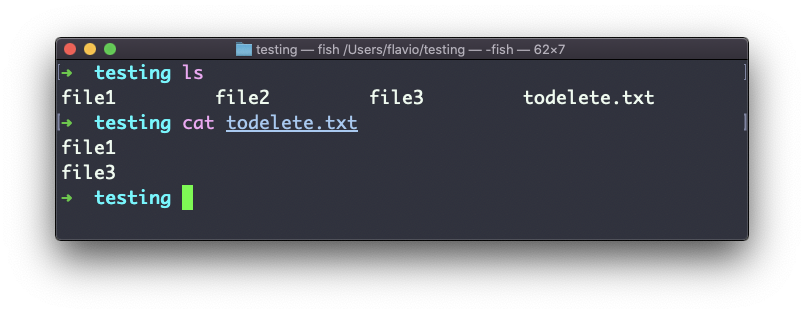
We will channel the output of cat todelete.txt to the rm command, through xargs.
In this way:
cat todelete.txt | xargs rm
That's the result, the files we listed are now deleted:
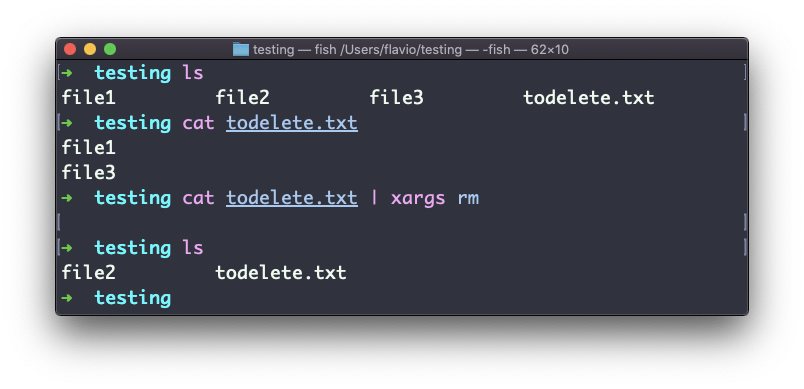
The way it works is that xargs will run rm 2 times, one for each line returned by cat.
This is the simplest usage of xargs. There are several options we can use.
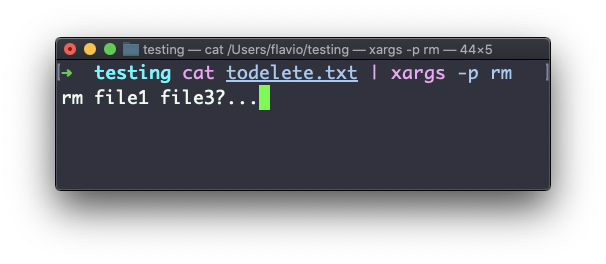
One of the most useful, in my opinion (especially when starting to learn xargs), is -p. Using this option will make xargs print a confirmation prompt with the action it's going to take:
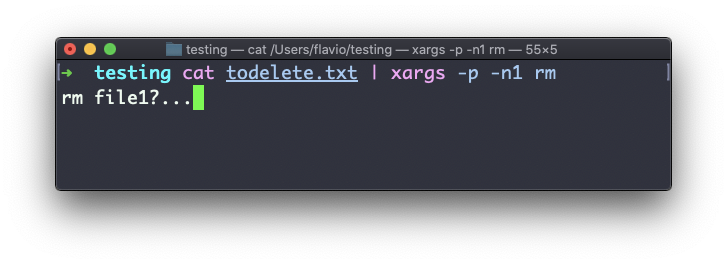
The -n option lets you tell xargs to perform one iteration at a time, so you can individually confirm them with -p. Here we tell xargs to perform one iteration at a time with -n1:
The -I option is another widely used one. It allows you to get the output into a placeholder, and then you can do various things.
One of them is to run multiple commands:
command1 | xargs -I % /bin/bash -c 'command2 %; command3 %'

You can swap the
%symbol I used above with anything else – it's a variable.
vim editor commandvim is a very popular file editor, especially among programmers. It's actively developed and frequently updated, and there's a big community around it. There's even a Vim conference!
vi in modern systems is just an alias for vim, which means vi improved.
You start it by running vi on the command line.
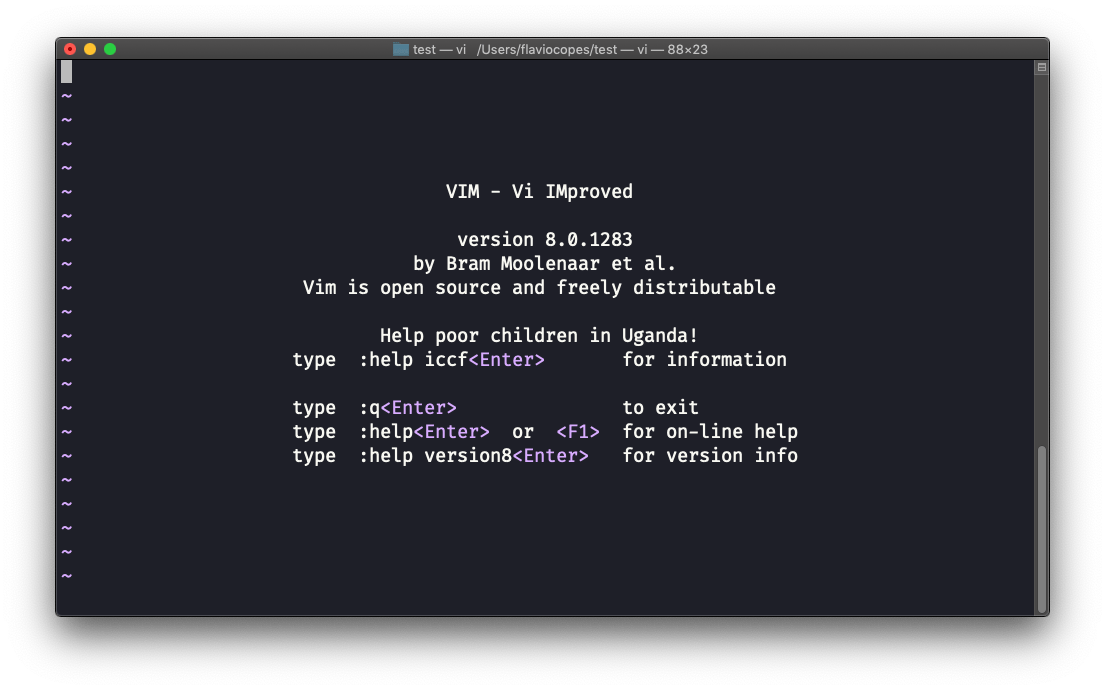
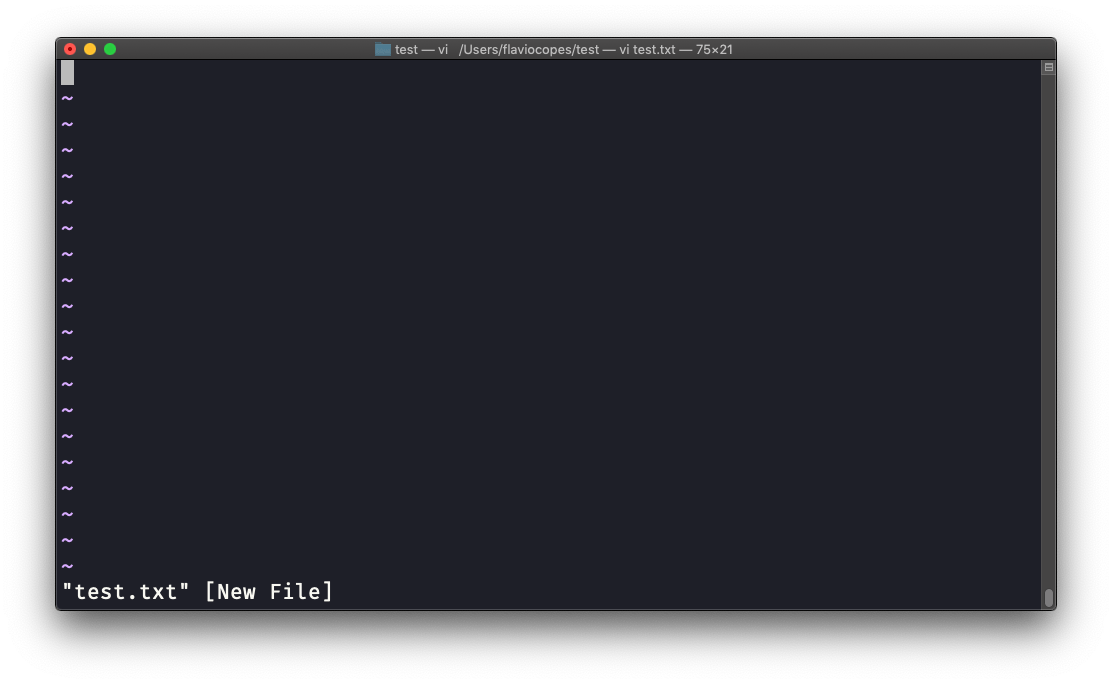
You can specify a filename at invocation time to edit that specific file:
vi test.txt
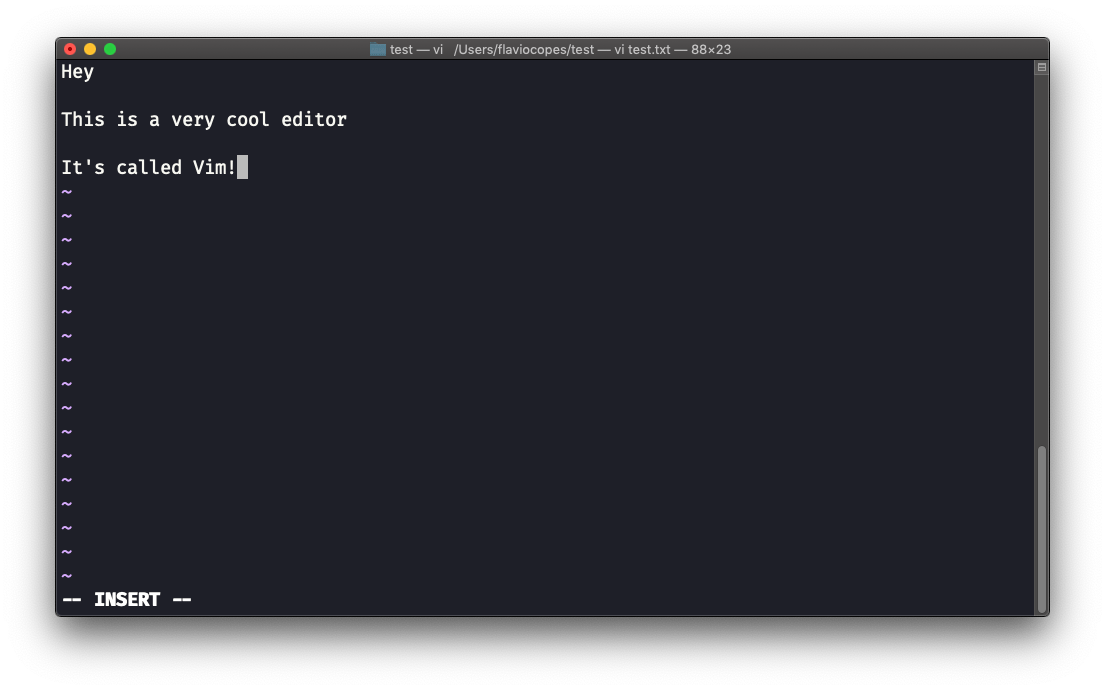
You have to know that Vim has 2 main modes:
When you start the editor, you are in command mode. You can't enter text like you expect from a GUI-based editor. You have to enter insert mode.
You can do this by pressing the i key. Once you do so, the -- INSERT -- word appears at the bottom of the editor:

Now you can start typing and filling the screen with the file contents:
You can move around the file with the arrow keys, or using the h - j - k - l keys. h-l for left-right, j-k for down-up.
Once you are done editing you can press the esc key to exit insert mode and go back to command mode.
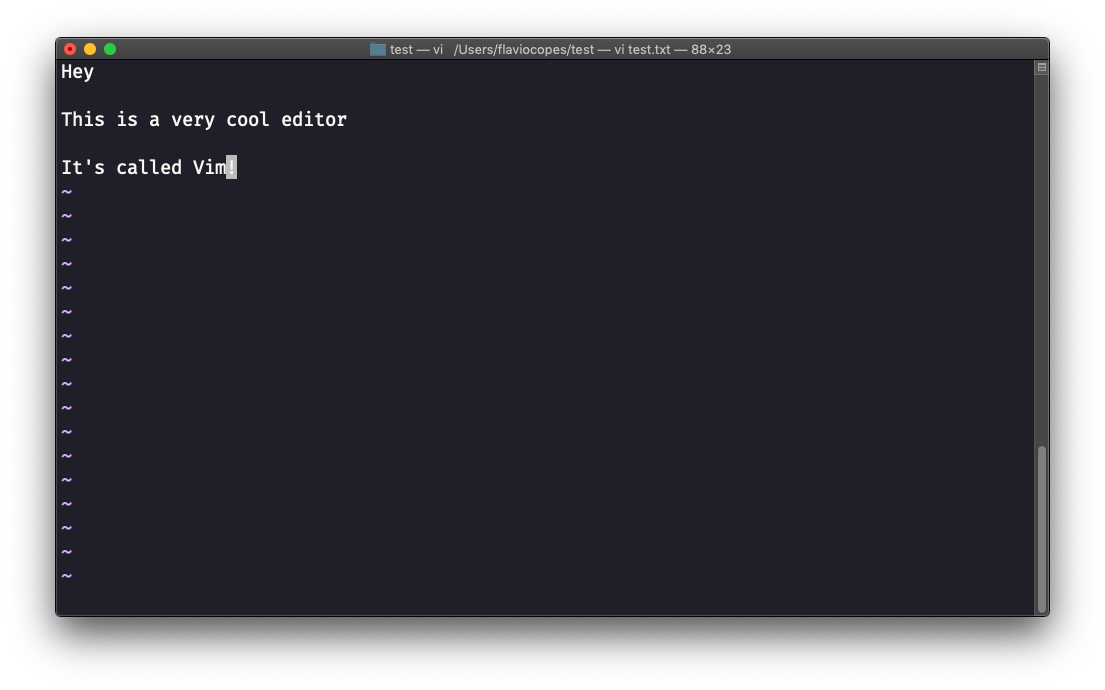
At this point you can navigate the file, but you can't add content to it (and be careful which keys you press, as they might be commands).
One thing you might want to do now is save the file. You can do so by pressing : (colon), then w.
You can save and quit by pressing : then w and q: :wq
You can quit without saving by pressing : then q and !: :q!
You can undo and edit by going to command mode and pressing u. You can redo (cancel an undo) by pressing ctrl-r.
Those are the basics of working with Vim. From here starts a rabbit hole we can't go into in this little introduction.
I will only mention those commands that will get you started editing with Vim:
x key deletes the character currently highlightedA goes to the end of the currently selected line0 to go to the start of the lined followed by w to delete that word. If you follow it with e instead of w, the white space before the next word is preservedd and w to delete more than 1 word, for example use d3w to delete 3 words forwardd followed by d to delete a whole entire line. Press d followed by $ to delete the entire line from where the cursor is, until the endTo find out more about Vim I can recommend the Vim FAQ. You can also run the vimtutor command, which should already be installed in your system and will greatly help you start your vim exploration.
emacs editor commandemacs is an awesome editor and it's historically regarded as the editor for UNIX systems. Famously, vi vs emacs flame wars and heated discussions have caused many unproductive hours for developers around the world.
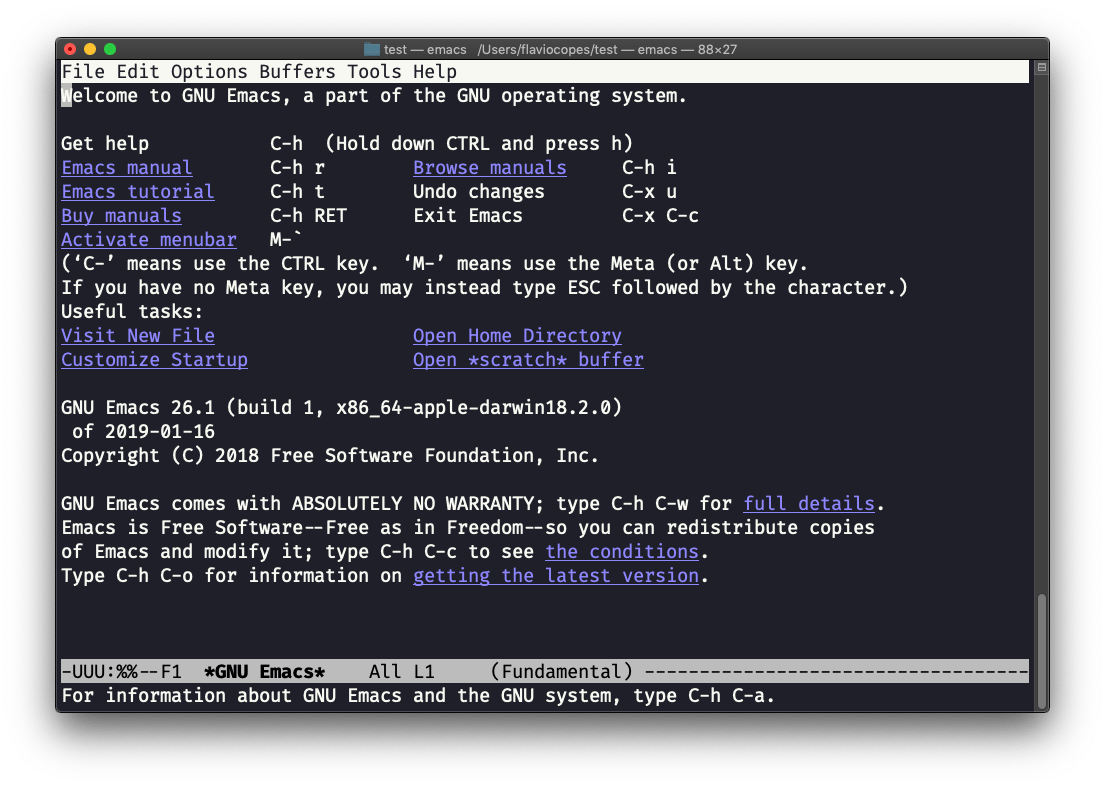
emacs is very powerful. Some people use it all day long as a kind of operating system (https://news.ycombinator.com/item?id=19127258). We'll just talk about the basics here.
You can open a new emacs session simply by invoking emacs:
macOS users, stop a second now. If you are on Linux there are no problems, but macOS does not ship applications using GPLv3, and every built-in UNIX command that has been updated to GPLv3 has not been updated.
While there is a little problem with the commands I listed up to now, in this case using an emacs version from 2007 is not exactly the same as using a version with 12 years of improvements and change.
This is not a problem with Vim, which is up to date. To fix this, run
brew install emacsand runningemacswill use the new version from Homebrew (make sure you have Homebrew installed).
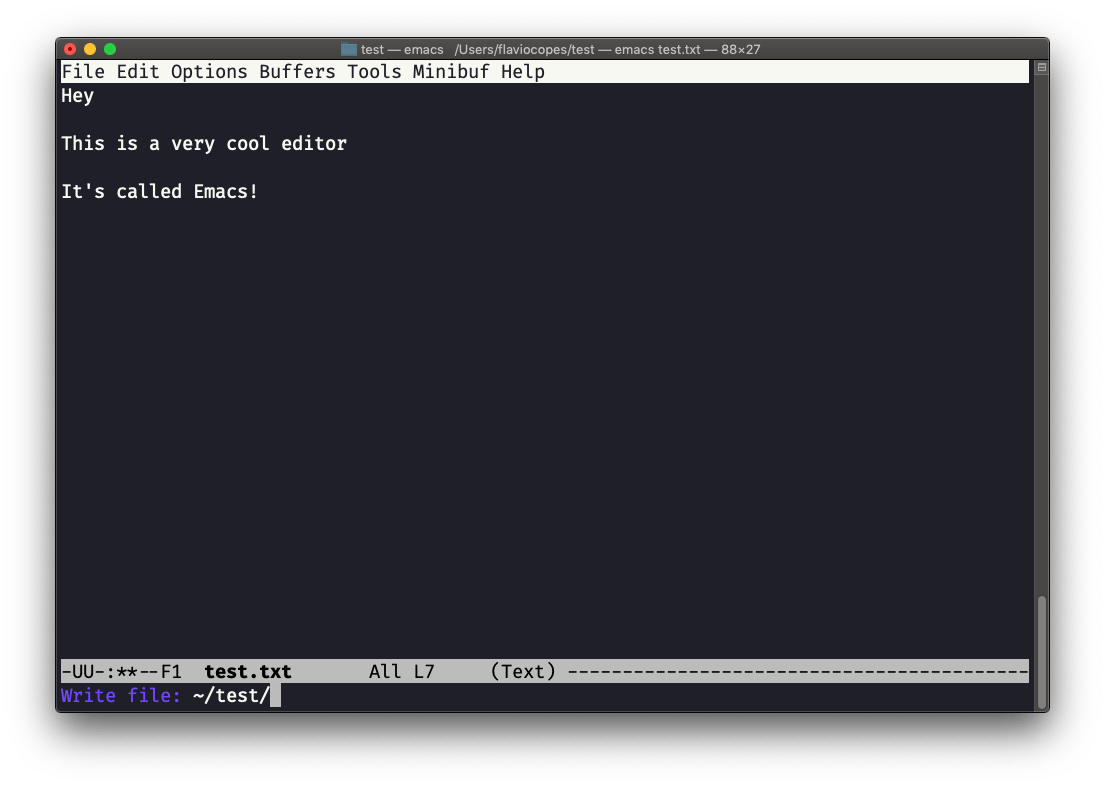
You can also edit an existing file by calling emacs <filename>:
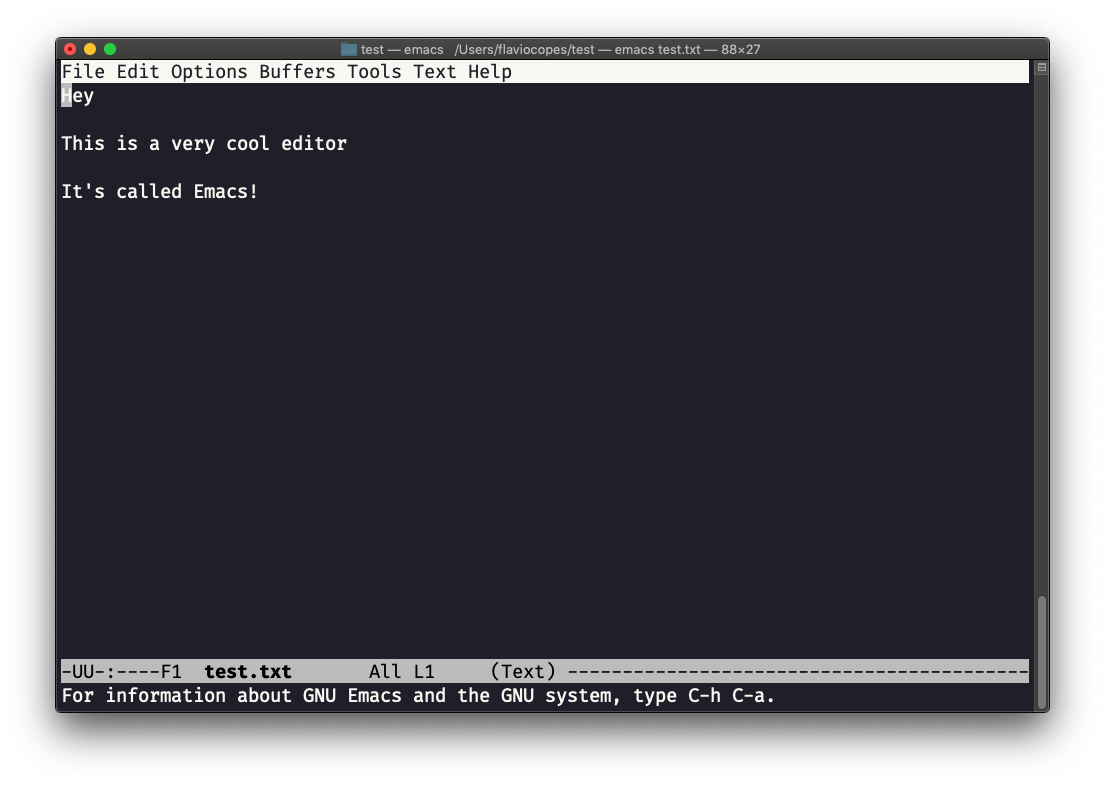
You can now start editing. Once you are done, press ctrl-x followed by ctrl-w. You confirm the folder:
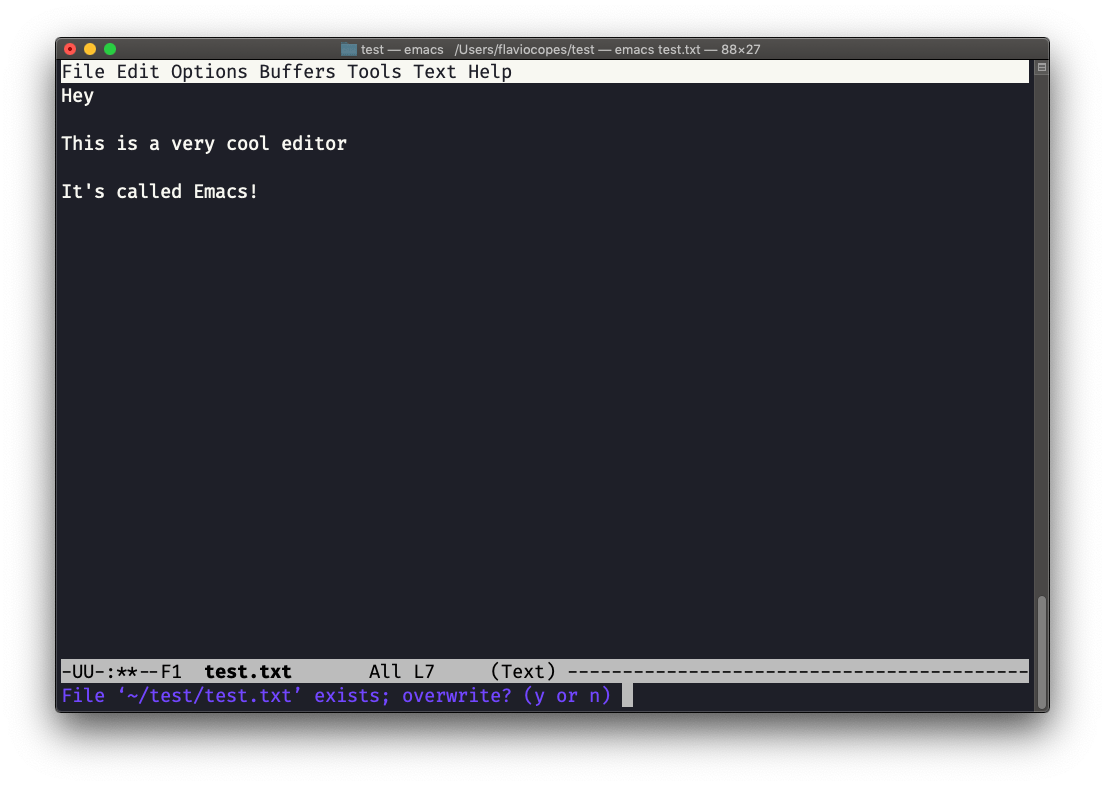
and Emacs tells you the file exists, asking you if it should overwrite it:
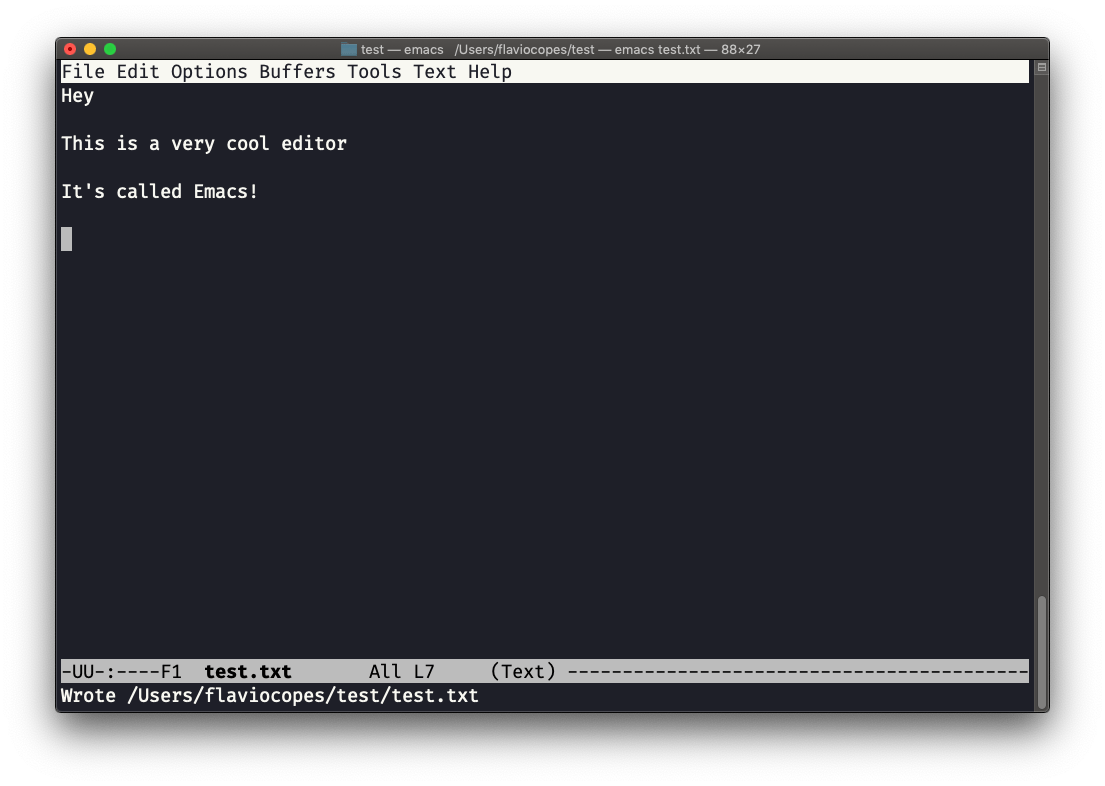
Answer y, and you get a confirmation of success:
You can exit Emacs by pressing ctrl-x followed by ctrl-c.
Or ctrl-x followed by c (keep ctrl pressed).
There is a lot to know about Emacs, certainly more than I am able to write in this little introduction. I encourage you to open Emacs and press ctrl-h r to open the built-in manual and ctrl-h t to open the official tutorial.
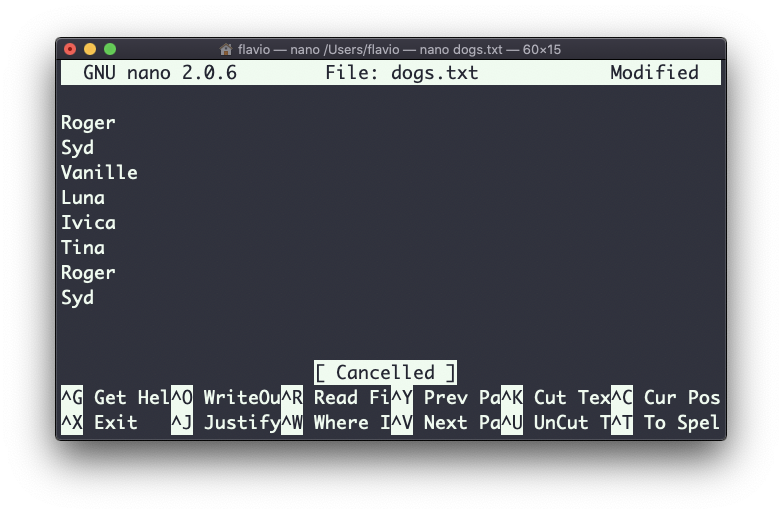
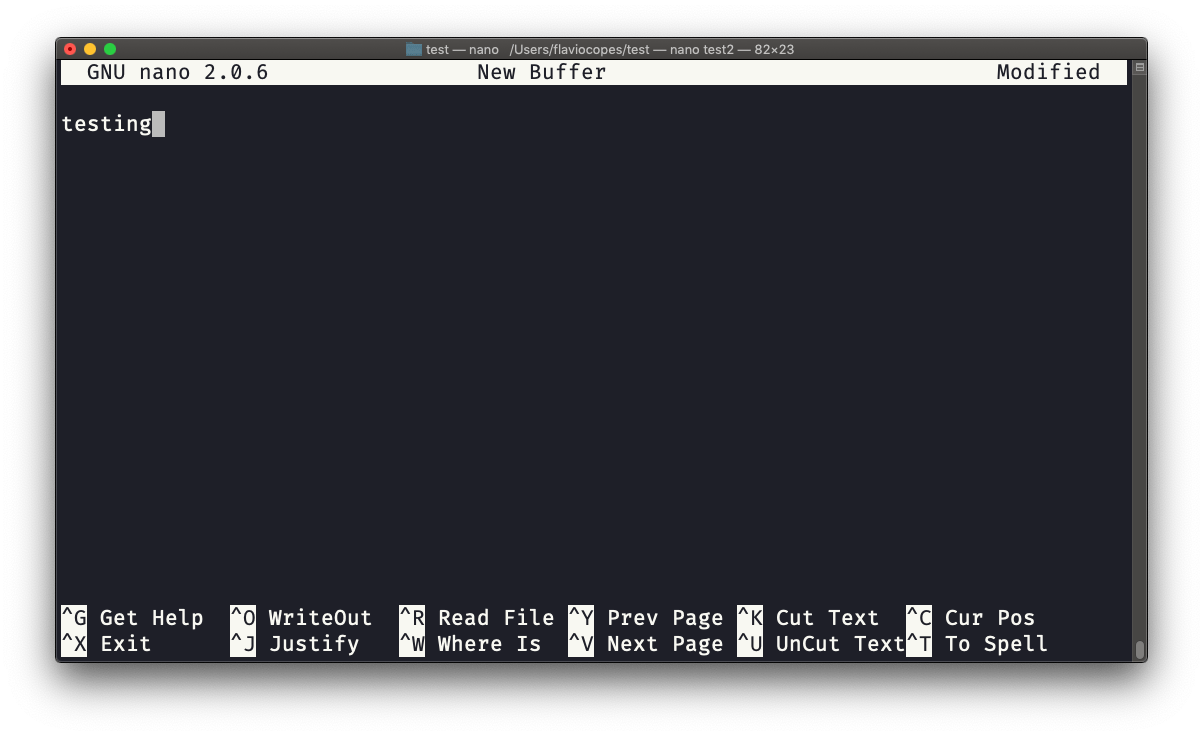
nano editor commandnano is a beginner friendly editor.
Run it using nano <filename>.
You can directly type characters into the file without worrying about modes.
You can quit without editing using ctrl-X. If you edited the file buffer, the editor will ask you for confirmation and you can save the edits, or discard them.
The help at the bottom shows you the keyboard commands that let you work with the file:
pico is more or less the same, although nano is the GNU version of pico which at some point in history was not open source. The nano clone was made to satisfy the GNU operating system license requirements.
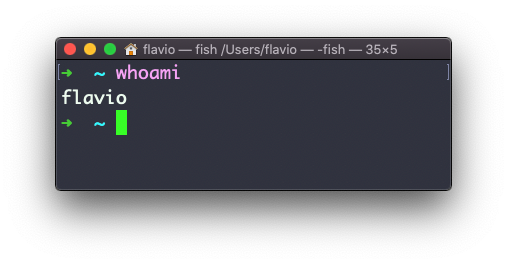
whoami commandType whoami to print the user name currently logged in to the terminal session:
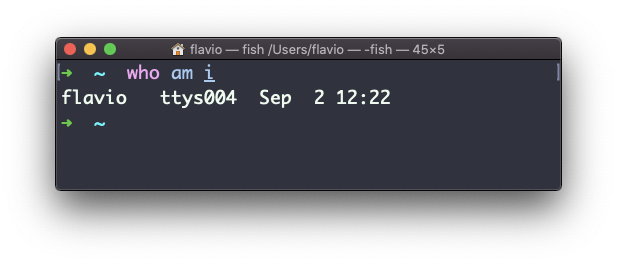
Note: this is different from the
who am icommand, which prints more information
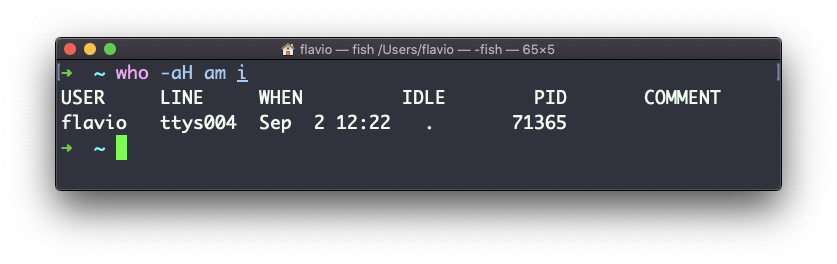
who commandThe who command displays the users logged in to the system.
Unless you're using a server multiple people have access to, chances are you will be the only user logged in, multiple times:
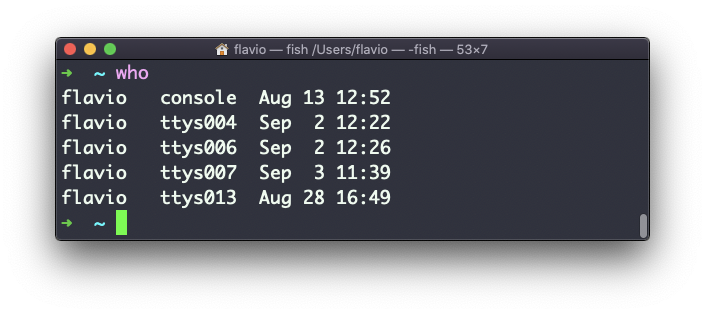
Why multiple times? Because each shell opened will count as an access.
You can see the name of the terminal used, and the time/day the session was started.
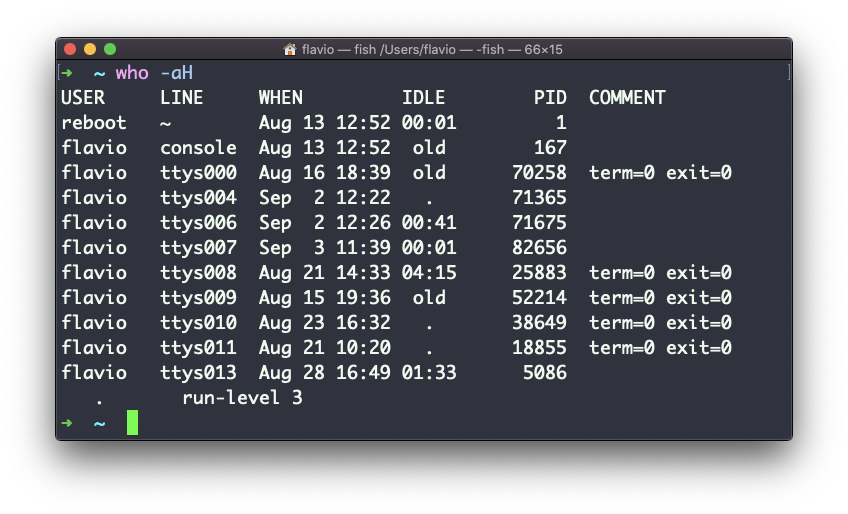
The -aH flags will tell who to display more information, including the idle time and the process ID of the terminal:
The special who am i command will list the current terminal session details:
su commandWhile you're logged in to the terminal shell with one user, you might need to switch to another user.
For example you're logged in as root to perform some maintenance, but then you want to switch to a user account.
You can do so with the su command:
su <username>
For example: su flavio.
If you're logged in as a user, running su without anything else will prompt you to enter the root user password, as that's the default behavior.
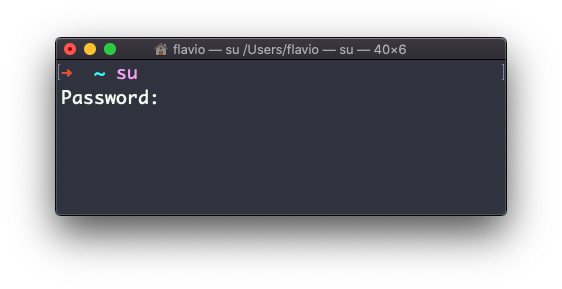
su will start a new shell as another user.
When you're done, typing exit in the shell will close that shell, and will return you back to the current user's shell.
sudo commandsudo is commonly used to run a command as root.
You must be enabled to use sudo, and once you are, you can run commands as root by entering your user's password (not the root user password).
The permissions are highly configurable, which is great especially in a multi-user server environment. Some users can be granted access to running specific commands through sudo.
For example you can edit a system configuration file:
sudo nano /etc/hosts
which would otherwise fail to save since you don't have the permissions
for it.
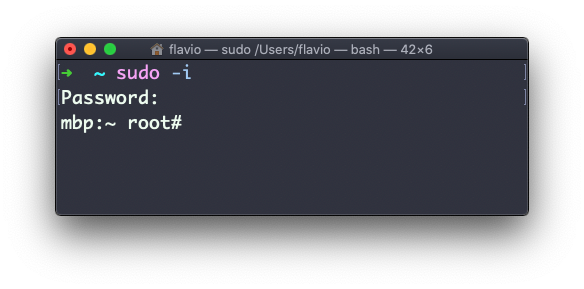
You can run sudo -i to start a shell as root:
You can use sudo to run commands as any user. root is the default, but use the -u option to specify another user:
sudo -u flavio ls /Users/flavio
passwd commandUsers in Linux have a password assigned. You can change the password using the passwd command.
There are two situations here.
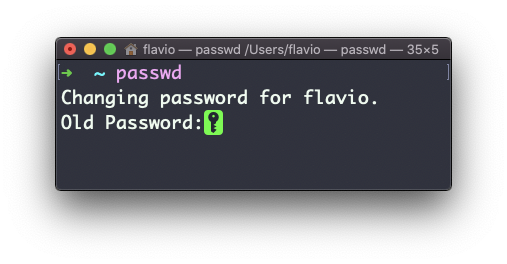
The first is when you want to change your password. In this case you type:
passwd
and an interactive prompt will ask you for the old password, then it will ask you for the new one:
When you're root (or have superuser privileges) you can set the username for which you want to change the password:
passwd <username> <new password>
In this case you don't need to enter the old one.
ping commandThe ping command pings a specific network host, on the local network or on the Internet.
You use it with the syntax ping <host> where <host> could be a domain name, or an IP address.
Here's an example pinging google.com:

The command sends a request to the server, and the server returns a response.
ping keeps sending the request every second, by default. It will keep running until you stop it with ctrl-C, unless you pass the number of times you want to try with the -c option: ping -c 2 google.com.
Once ping is stopped, it will print some statistics about the results: the percentage of packages lost, and statistics about the network performance.
As you can see the screen prints the host IP address, and the time that it took to get the response back.
Not all servers support pinging, in case the request times out:
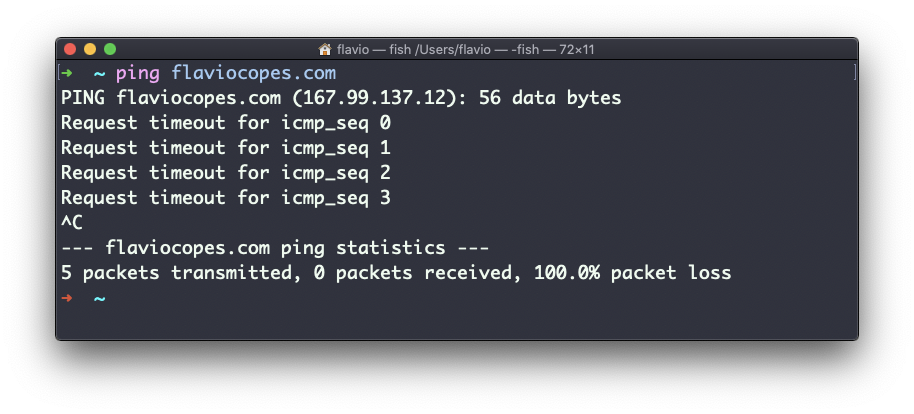
Sometimes this is done on purpose, to "hide" the server, or just to reduce the load. The ping packets can also be filtered by firewalls.
ping works using the ICMP protocol (Internet Control Message Protocol), a network layer protocol just like TCP or UDP.
The request sends a packet to the server with the ECHO_REQUEST message, and the server returns a ECHO_REPLY message. I won't go into details, but this is the basic concept.
Pinging a host is useful to know if the host is reachable (supposing it implements ping), and how distant it is in terms of how long it takes to get back to you.
Usually the nearer the server is geographically, the less time it will take to return back to you. Simple physical laws cause a longer distance to introduce more delay in the cables.
traceroute commandWhen you try to reach a host on the Internet, you go through your home router. Then you reach your ISP network, which in turn goes through its own upstream network router, and so on, until you finally reach the host.
Have you ever wanted to know what steps your packets go through to do that?
The traceroute command is made for this.
You invoke
traceroute <host>
and it will (slowly) gather all the information while the packet travels.
In this example I tried reaching for my blog with traceroute flaviocopes.com:
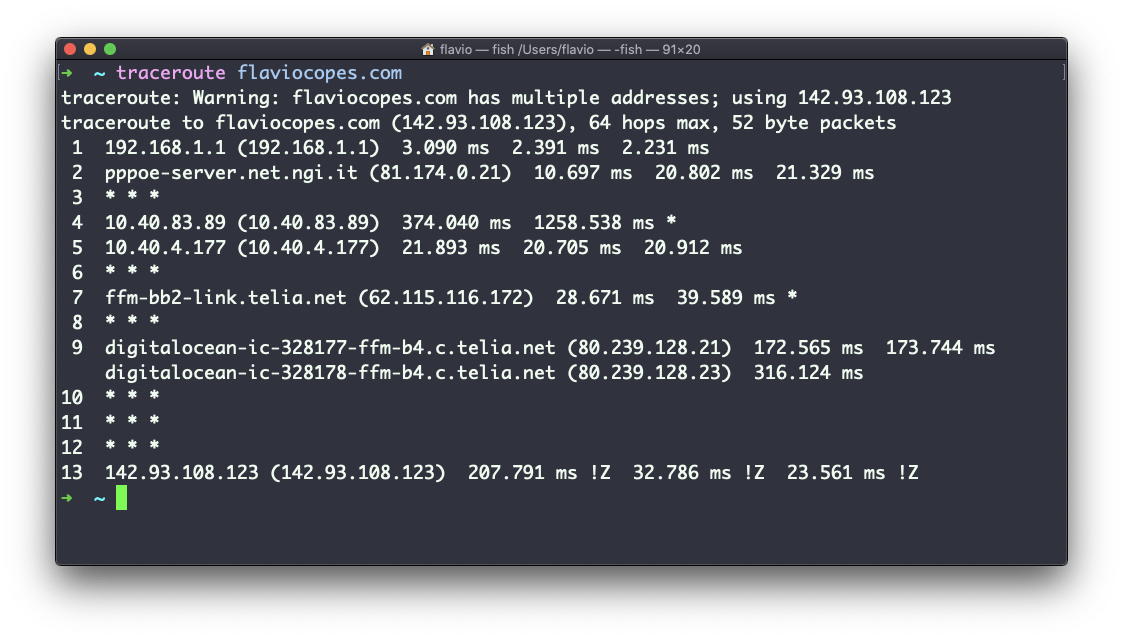
Not every router travelled returns us information. In this case, traceroute prints * * *. Otherwise, we can see the hostname, the IP address, and some performance indicator.
For every router we can see 3 samples, which means traceroute tries by default 3 times to get you a good indication of the time needed to reach it.
This is why it takes this long to execute traceroute compared to simply doing a ping to that host.
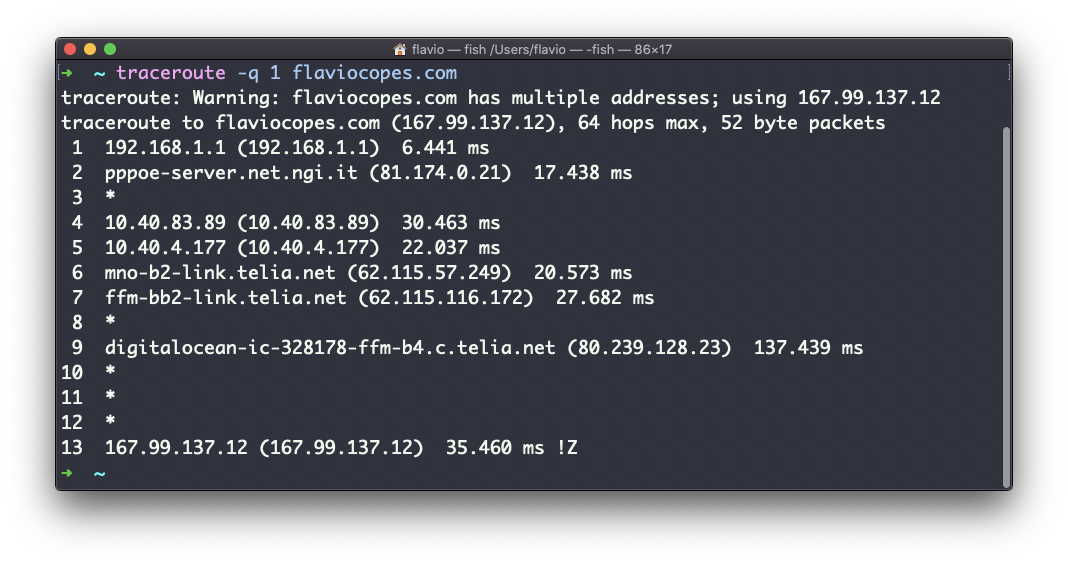
You can customize this number with the -q option:
traceroute -q 1 flaviocopes.com
clear commandType clear to clear all the previous commands that were run in the current terminal.
The screen will clear and you will just see the prompt at the top:
Note: this command has a handy shortcut:
ctrl-L
Once you do that, you will lose access to scrolling to see the output of the previous commands entered.
So you might want to use clear -x instead, which still clears the screen, but lets you go back to see the previous work by scrolling up.
history commandEvery time you run a command, it's memorized in the history.
You can display all the history using:
history
This shows the history with numbers:
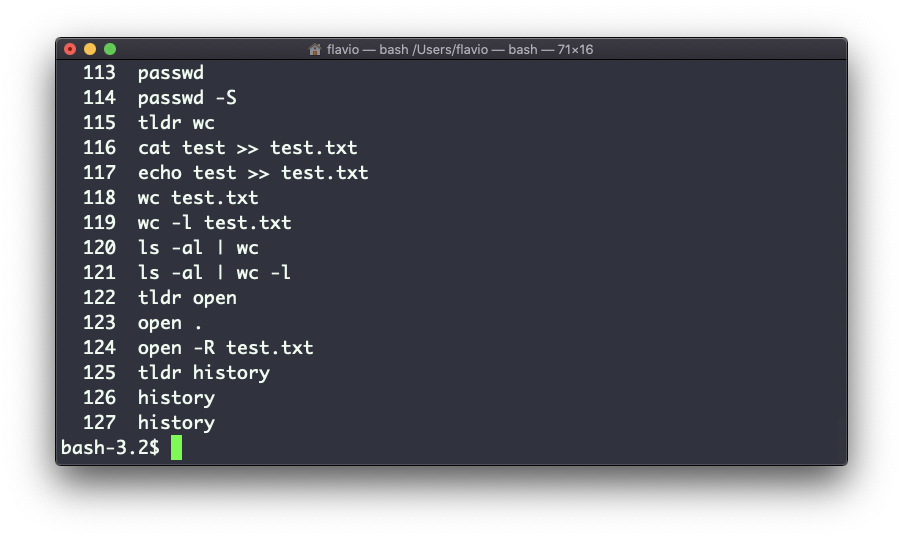
You can use the syntax !<command number> to repeat a command stored in the history. In the above example typing !121 will repeat the ls -al | wc -l command.
Typically the last 500 commands are stored in the history.
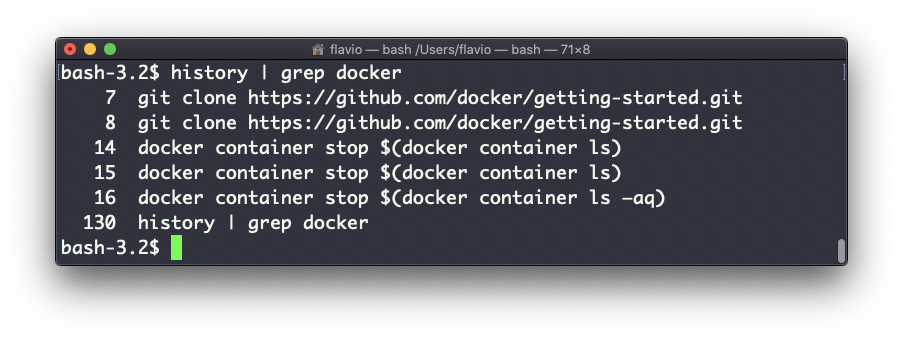
You can combine this with grep to find a command you ran:
history | grep docker
To clear the history, run history -c.
export commandThe export command is used to export variables to child processes.
What does this mean?
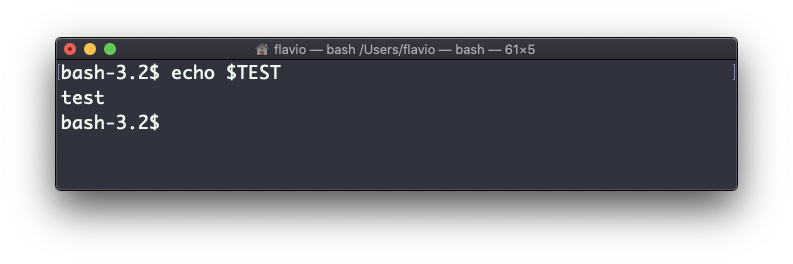
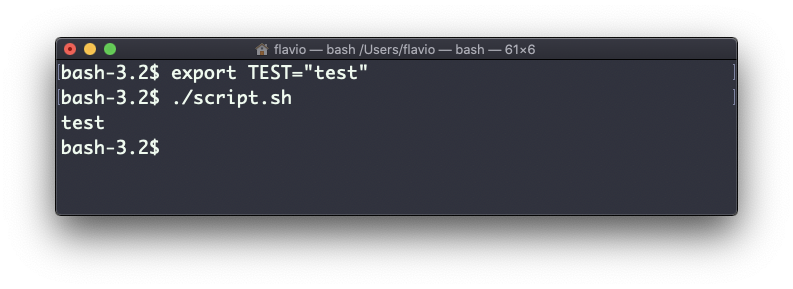
Suppose you have a variable TEST defined in this way:
TEST="test"
You can print its value using echo $TEST:
But if you try defining a Bash script in a file script.sh with the above command:
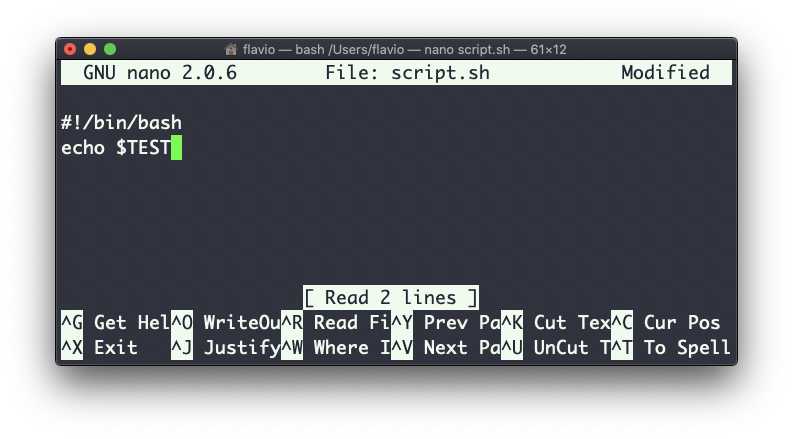
Then when you set chmod u+x script.sh and you execute this script with ./script.sh, the echo $TEST line will print nothing!
This is because in Bash the TEST variable was defined local to the shell. When executing a shell script or another command, a subshell is launched to execute it, which does not contain the current shell local variables.
To make the variable available there we need to define TEST not in this way:
TEST="test"
but in this way:
export TEST="test"
Try that, and running ./script.sh now should print "test":
Sometimes you need to append something to a variable. It's often done with the PATH variable. You use this syntax:
export PATH=$PATH:/new/path
It's common to use export when you create new variables in this way. But you can also use it when you create variables in the .bash_profile or .bashrc configuration files with Bash, or in .zshenv with Zsh.
To remove a variable, use the -n option:
export -n TEST
Calling export without any option will list all the exported variables.
crontab commandCron jobs are jobs that are scheduled to run at specific intervals. You might have a command perform something every hour, or every day, or every 2 weeks. Or on weekends.
They are very powerful, especially when used on servers to perform maintenance and automations.
The crontab command is the entry point to work with cron jobs.
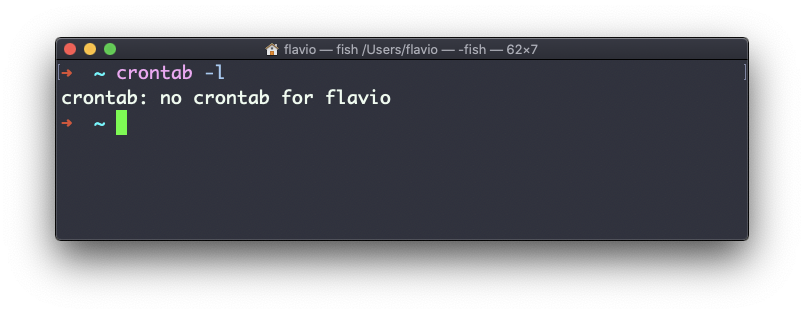
The first thing you can do is to explore which cron jobs are defined by you:
crontab -l
You might have none, like me:
Run
crontab -e
to edit the cron jobs, and add new ones.
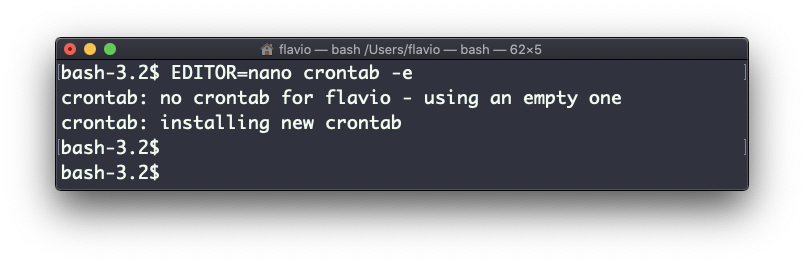
By default this opens with the default editor, which is usually vim. I like nano more. You can use this line to use a different editor:
EDITOR=nano crontab -e
Now you can add one line for each cron job.
The syntax to define cron jobs is kind of scary. This is why I usually use a website to help me generate it without errors: https://crontab-generator.org/
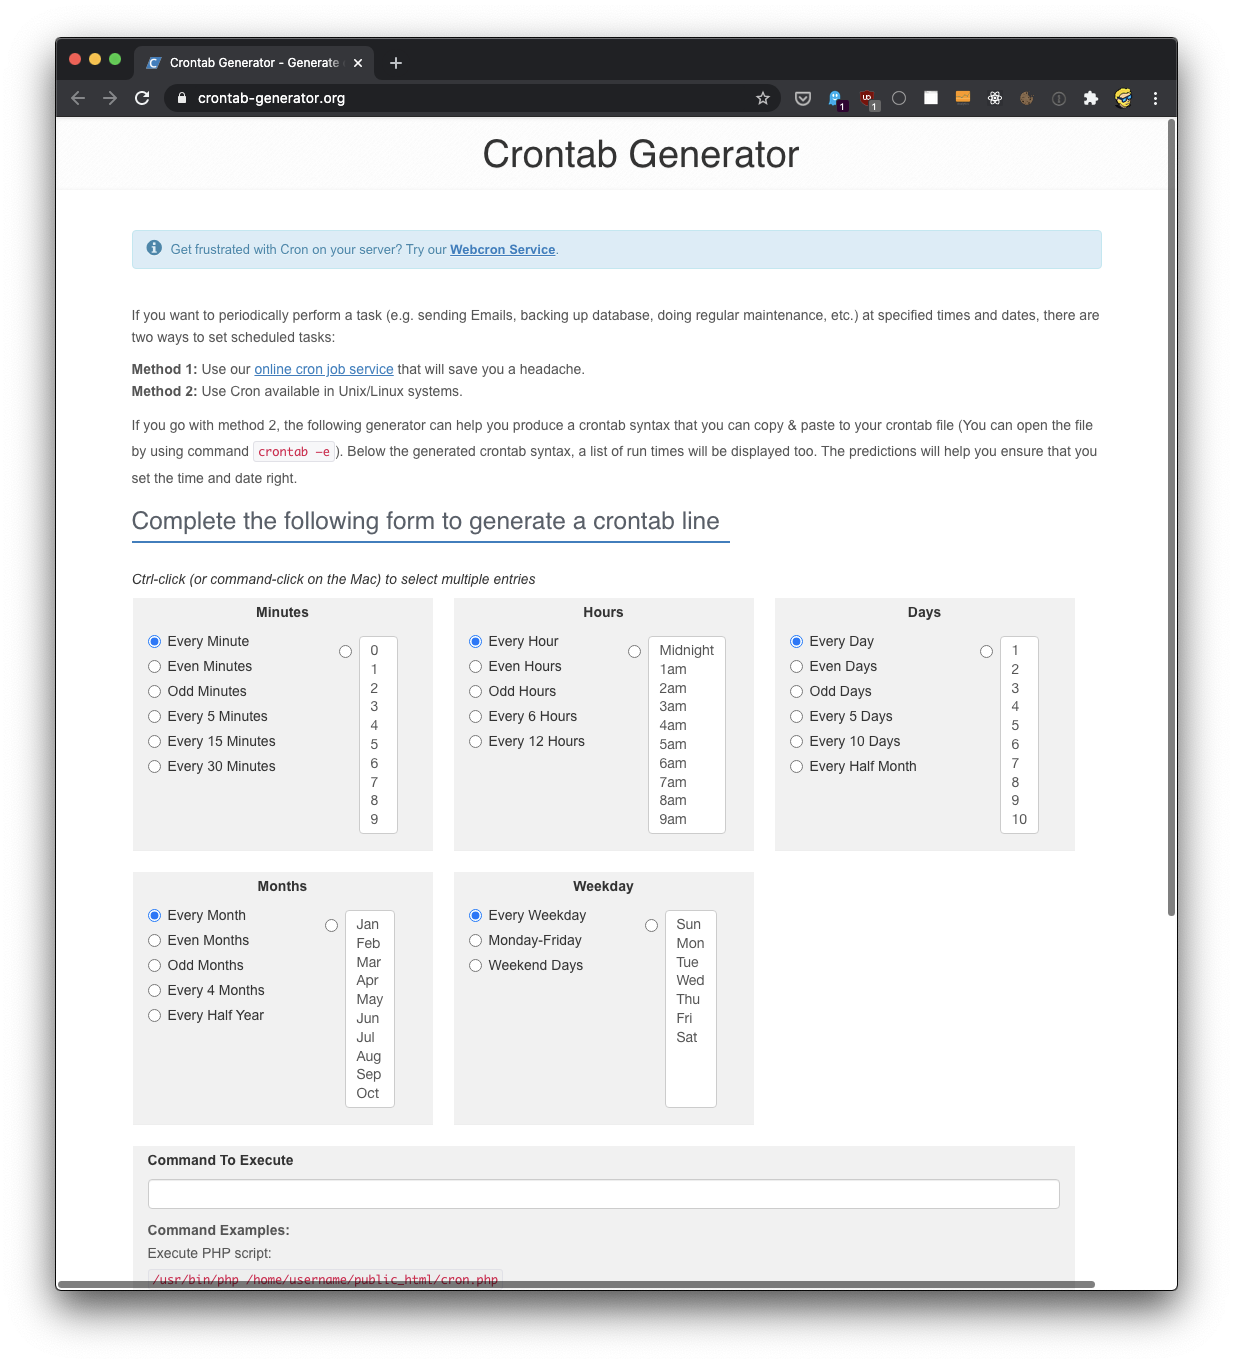
You pick a time interval for the cron job, and you type the command to execute.
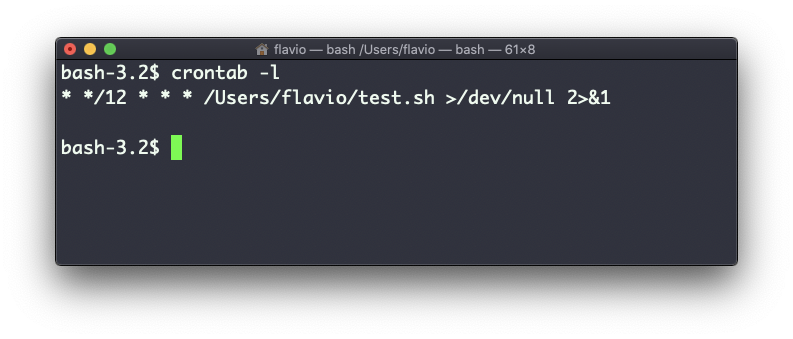
I chose to run a script located in /Users/flavio/test.sh every 12 hours. This is the crontab line I need to run:
* */12 * * * /Users/flavio/test.sh >/dev/null 2>&1
I run crontab -e:
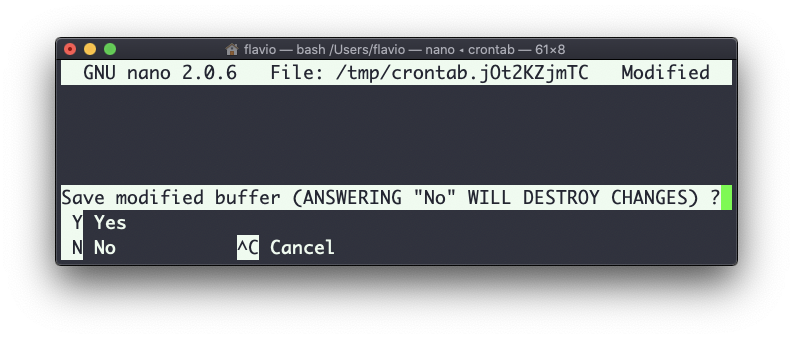
EDITOR=nano crontab -e
and I add that line, then I press ctrl-X and press y to save.
If all goes well, the cron job is set up:
Once this is done, you can see the list of active cron jobs by running:
crontab -l
You can remove a cron job running crontab -e again, removing the line and exiting the editor:

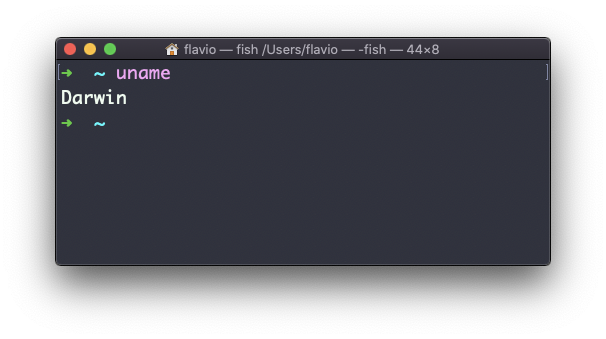
uname commandCalling uname without any options will return the Operating System codename:
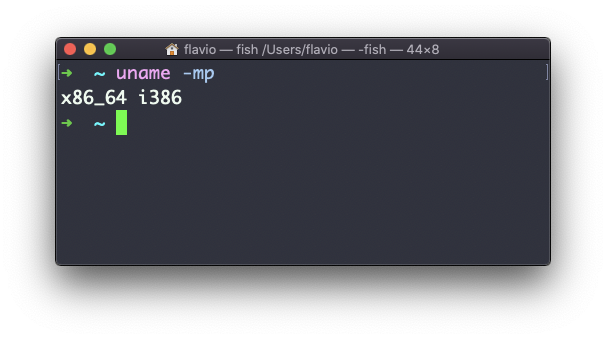
The m option shows the hardware name (x86_64 in this example) and the p option prints the processor architecture name (i386 in this example):
The s option prints the Operating System name. r prints the release, and v prints the version:

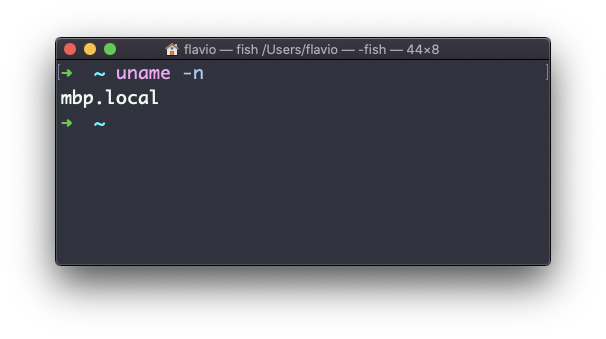
The n option prints the node network name:
The a option prints all the information available:
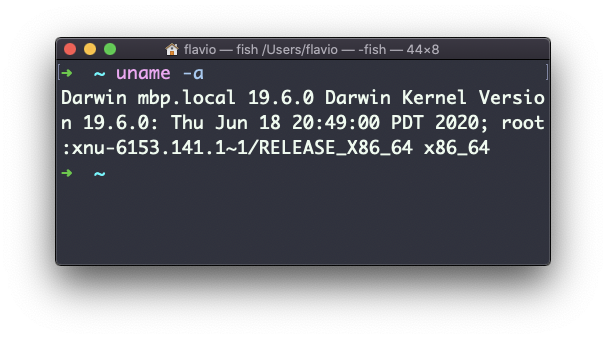
On macOS you can also use the sw_vers command to print more information about the macOS Operating System. Note that this differs from the Darwin (the Kernel) version, which above is 19.6.0.
Darwin is the name of the kernel of macOS. The kernel is the "core" of the Operating System, while the Operating System as a whole is called macOS. In Linux, Linux is the kernel, and GNU/Linux would be the Operating System name (although we all refer to it as "Linux").
env commandThe env command can be used to pass environment variables without setting them on the outer environment (the current shell).
Suppose you want to run a Node.js app and set the USER variable to it.
You can run
env USER=flavio node app.js
and the USER environment variable will be accessible from the Node.js app via the Node process.env interface.
You can also run the command clearing all the environment variables already set, using the -i option:
env -i node app.js
In this case you will get an error saying env: node: No such file or directory because the node command is not reachable, as the PATH variable used by the shell to look up commands in the common paths is unset.
So you need to pass the full path to the node program:
env -i /usr/local/bin/node app.js
Try with a simple app.js file with this content:
console.log(process.env.NAME)
console.log(process.env.PATH)
You will see the output as
undefined
undefined
You can pass an env variable:
env -i NAME=flavio node app.js
and the output will be
flavio
undefined
Removing the -i option will make PATH available again inside the program:
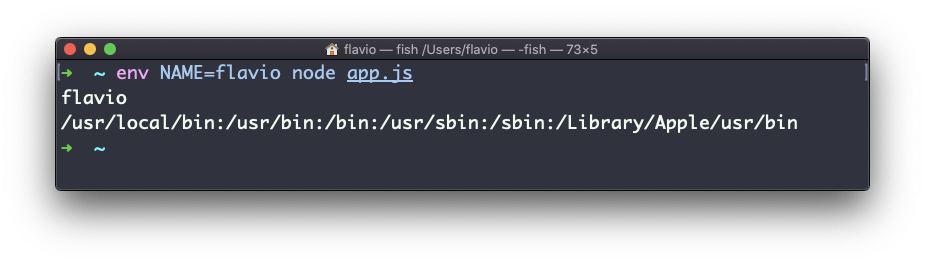
The env command can also be used to print out all the environment variables. If run with no options:
env
it will return a list of the environment variables set, for example:
HOME=/Users/flavio
LOGNAME=flavio
PATH=/usr/local/bin:/usr/bin:/bin:/usr/sbin:/sbin:/Library/Apple/usr/bin
PWD=/Users/flavio
SHELL=/usr/local/bin/fish
You can also make a variable inaccessible inside the program you run, using the -u option. For example this code removes the HOME variable from the command environment:
env -u HOME node app.js
printenv commandHere's a quick guide to the printenv command, used to print the values of environment variables
In any shell there are a good number of environment variables, set either by the system, or by your own shell scripts and configuration.
You can print them all to the terminal using the printenv command. The output will be something like this:
HOME=/Users/flavio
LOGNAME=flavio
PATH=/usr/local/bin:/usr/bin:/bin:/usr/sbin:/sbin:/Library/Apple/usr/bin
PWD=/Users/flavio
SHELL=/usr/local/bin/fish
with a few more lines, usually.
You can append a variable name as a parameter, to only show that variable value:
printenv PATH

*Скачать
Или отсюда: